Buttermilk Pull-Apart Dinner Rolls

Buttermilk_Pull-Apart_Dinner_Rolls-1.jpg

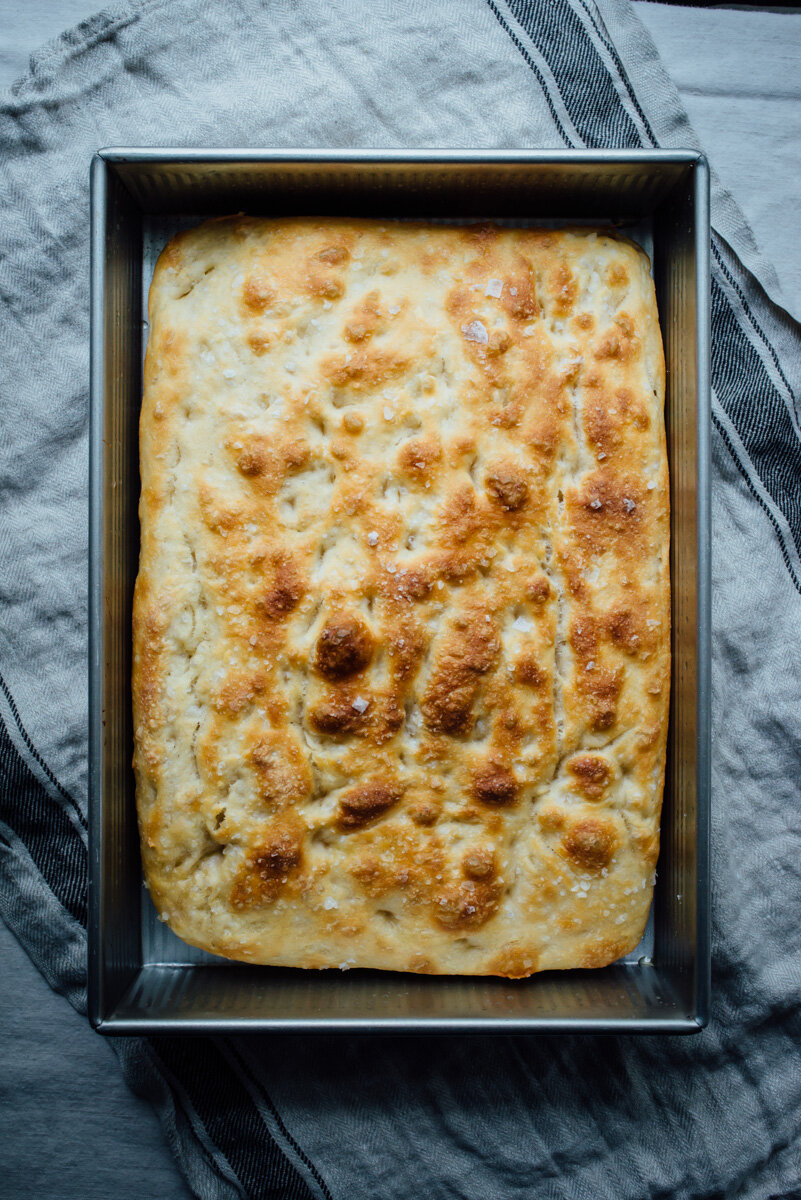
Buttermilk Pull-Apart Dinner Rolls. Ok, so rarely on this blog do I insist “You have to make these!” but I am now. I made these Buttermilk Pull-Apart Dinner Rolls last week for Thanksgiving and they tasted so incredibly good! But on my second try here they are even better! Last week I made the original recipe, halved, 12 rolls (rather than 24) and they didn’t really fill out the 9” square pan, although they were really good, I didn’t get the pull-apart effect I was expecting and they were on the small side. So this recipe I made slightly larger rolls in a smaller 8” round pan and they came out great! The recipe is adapted from Alexandra’s Kitchen, she has a great blog and I recommend watching her videos, they’re awesome! 

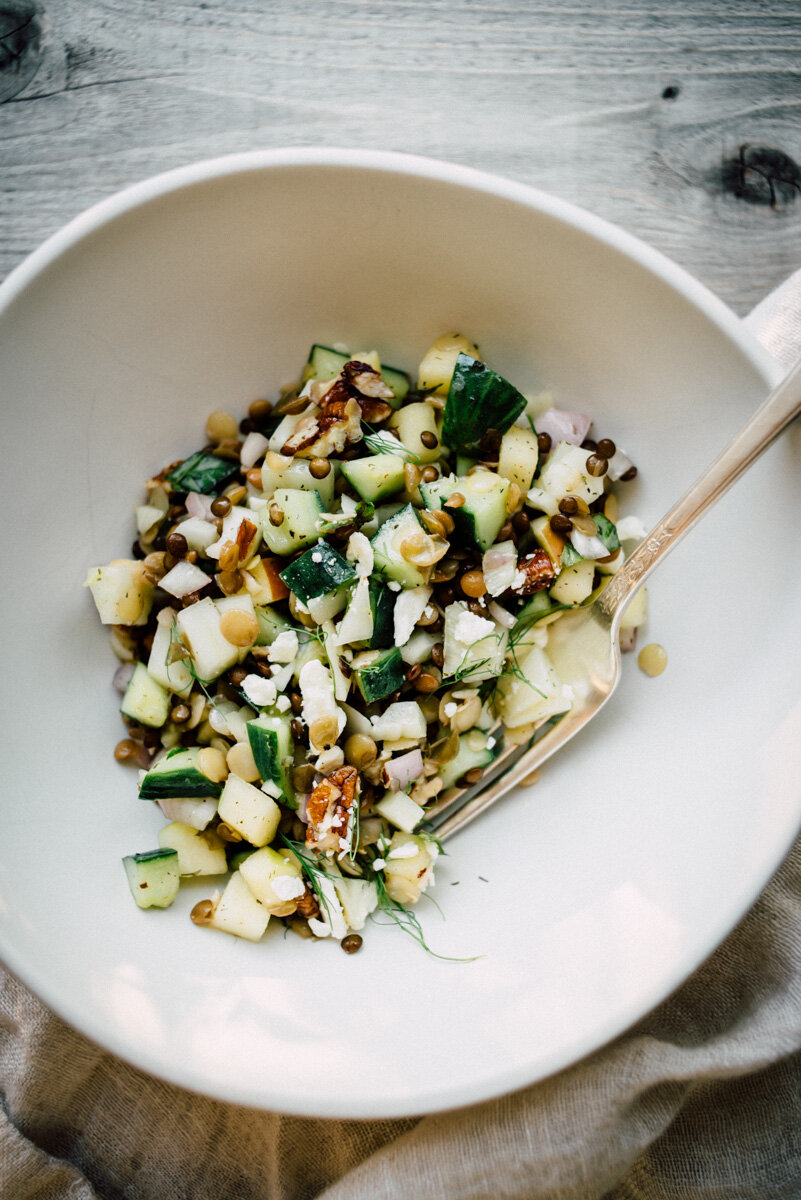
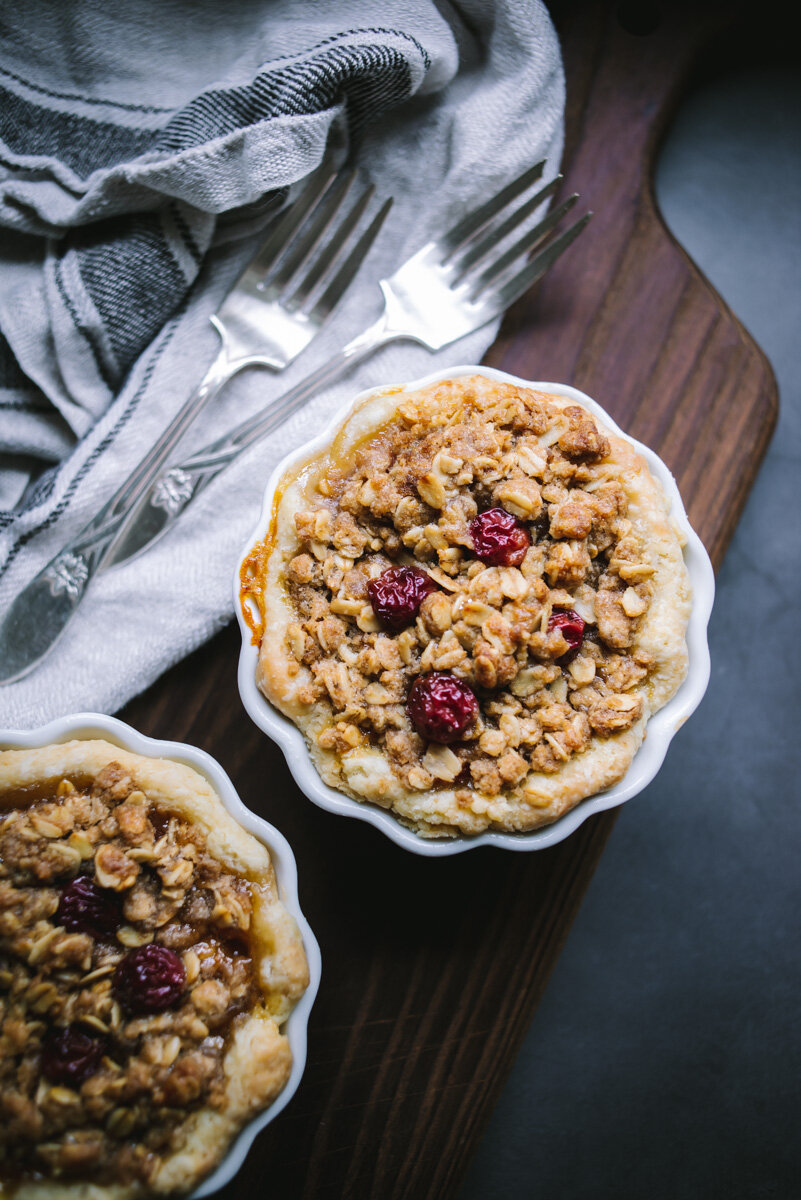
If you saw my Instagram stories you remember I made a buttermilk-brind chicken for Thanksgiving, and also made the Dried Cherries and Sausage Stuffing. Along with that we had mashed potatoes with roasted garlic, Rainbow Chard, Cranberry relish, and a Butternut Squash Kaddu which I really should blog about. I made this apple pie but decided on a crumble topping instead, which I really liked, I like a pie that has three different flavor experiences - pie crust, fruit, crumble (and/or cream). 

Getting back to the dinner rolls, they are soft and airy and still have a bit of chew on the outside, they are just so good. 

I thought these were called Parker House Rolls, but the wiki page on them describes something quite different, something moon shaped! Going back to the 19th century with angry pastry cooks throwing unfinished rolls into the oven? Anyways you won’t be throwing these around and only into your mouth.

Good stuff! Enjoy and I hope to get you some more recipes before the xmas holiday.

Also, these tastes great with butter and jam for a snack. :)

Buttermilk_Pull-Apart_Dinner_Rolls-2.jpg
Buttermilk_Pull-Apart_Dinner_Rolls-3.jpg
Buttermilk_Pull-Apart_Dinner_Rolls-4.jpg
Buttermilk_Pull-Apart_Dinner_Rolls-6.jpg
Buttermilk_Pull-Apart_Dinner_Rolls-5.jpg
Buttermilk_Pull-Apart_Dinner_Rolls-7.jpg
Buttermilk_Pull-Apart_Dinner_Rolls-8.jpg

Buttermilk Pull-Apart Dinner Rolls 

  • 2 cups all-purpose flour, plus more for shaping

  • 1 teaspoon kosher salt

  • 1 tablespoon sugar 

  • 1 teaspoon instant yeast

  • 1/2 cup boiling water 

  • 1/2 cup buttermilk*

  • 2 tablespoons melted butter

  • 1 tablespoon melted butter and flaky sea salt for topping

*You can make buttermilk by adding 1 tablespoon vinegar or lemon juice to a 1/2 cup of whole milk and let it sit for 5-10 minutes.

In a large bowl, whisk together the flour salt, sugar, and instant yeast.

In a 1-cup liquid measuring cup pour the boiling water over the buttermilk and let stand for 10 minutes, the buttermilk will look curdled then give it a stir.

Pour the buttermilk mixture and the 2 tablespoons of melted butter over the flour mixture. Stir until a sticky ball of dough forms. Cover the bowl with plastic wrap and set aside in a warm place to rise for 2 hours or until doubled in bulk.

Grease an 8×8-inch baking dish or 8” round cake pan. Flour a work surface and sprinkle flour lightly over the dough and around the edges. Gently fold the dough out of the bowl onto the floured work surface and shape into a rough ball, if it’s sticky add more flour. Use a bench scraper to divide the ball into 3 equal portions. Shape each portion roughly into a ball, then use a bench scraper to divide each ball into 3 roughly even portions to create 9 small round pieces total. If the sizes look odd just tear off the big ones to get the smaller ones up to size, the dough is very forgiving and won’t ruin the rolls!

Place the dough balls into the prepared pan, spacing them evenly apart.

Preheat the oven to 375°.

At this point, you can cover the pan and refrigerate overnight. Otherwise let the dough rise covered with plastic wrap for 25 to 35 minutes, or until the dough pieces have puffed to almost fill the pan. (Note: If you refrigerate overnight, remove the pan 30 to 45 minutes prior to baking.) 

Place the baking pan in the oven and bake for 20-25 minutes, or until golden brown. Remove pan from the oven and immediately brush the surface of the rolls with one tablespoon of melted butter, then sprinkle flaky salt over top. Let the rolls cool in the pan for a 10 minutes or so, then turn the pan out onto a cooling rack and invert onto a plate or serving platter. Serve warm with more butter on the side. 

Oatmeal Raisin Molasses Cookies

oatmeal_Raisin_molasses_cookies-1.jpg

First. Election. If you’re voting by mail and haven’t yet, please drop your ballot in a ballot box or at your local election ballot drop-off location, more info here! So you are sure your vote will be counted! Late ballots by mail might not be counted if they’re received late and your vote really does matter!

So cookies. I’ve been meaning to try out this recipe for a while. We had some incredibly good cookies from Costco recently, their oatmeal raisin cookies were amazing. I could taste the molasses. So I ventured onto this recipe. It’s really good! But it’s definitely heavier on molasses than the ones I had from Costco. Still, this recipe makes a great cookie, it’s chewy and falls somewhere between oatmeal raisin and gingerbread. I love molasses and wonder why I don’t bake with it more? I made a few adjustments with butter and sugar but I think you will like it.

And so, you know, we have this election coming up (which is a big freakin’ deal!) but I feel remarkably calm about it. I really think that Biden is going to win. I do. Obviously I could be totally wrong, but… everything is telling me that he is going to win. Trump will blame everyone and everything possible, because of course nothing is ever his fault according to him. But man, I want that moment next week where the American people can say to Trump: “You’re Fired!”

I want that so bad.

I didn’t expect Joe Biden to be the one that could make this happen. But the people have spoken and here we are, which I’m totally ok with. And also, Kamala Harris! Here we have a woman (also POC) running as vice-president and it’s like not even a big deal! How awesome is that?! :) I’m old enough to have voted for Geraldine Ferraro in 1984 and it’s kind of incredible that there has not been one woman on the Presidential ticket since then, with the exception of Hillary in 2016, but really, why not?

Let’s hope I’m right.

Good Vibes going into this. And good cookies to get us through. We can do this. #votebiden

oatmeal_Raisin_molasses_cookies-2.jpg
oatmeal_Raisin_molasses_cookies-3.jpg
oatmeal_Raisin_molasses_cookies-4.jpg
oatmeal_Raisin_molasses_cookies-5.jpg
oatmeal_Raisin_molasses_cookies-6.jpg

Oatmeal Raisin Molasses Cookies

  • 1 1/2 cups raisins

  • 1/2 cup unsalted butter

  • 3/4 cup sugar

  • 3/4 cup brown sugar

  • 2 large eggs, room temp

  • 1/2 cup molasses

  • 2 cups rolled oats

  • 1-3/4 cups all-purpose flour

  • 1 teaspoon baking soda

  • 1 teaspoon salt

  • 1 (heaping) teaspoon cinnamon

Plump the raisins, place raisins in a bowl, cover with boiling water and let stand for 5 minutes. Then drain and set aside.

In a large bowl (or stand mixer) beat together the butter and sugars until light and fluffy. Add eggs one at a time, beating well after each. Beat in molasses. In a separate bowl whisk together the oats, flour, baking soda, salt and cinnamon. Gradually add the oat mixture to the butter mixture with a wooden spoon and mix well. Stir in raisins.

Place a tablespoon of cookie dough 2 inches apart onto parchment lined baking sheet. Bake at 350° for 12-14 minutes (mine were done in 14 minutes). Remove from oven and let cool a few minutes, then transfer to cooling rack. This recipe makes a lot of cookies! 5 dozen at this size cookie. I make a couple batches then refrigerate the rest of the dough. You can also freeze the dough so you can make the cookies at your own pace. 

Recipe adapted from Taste of Home

Crunchy Veggie Lentil Salad

crunchy_veggie_lentil_salad-1.jpg

Crunchy Veggie Lentil Salad. I haven’t had lentil salad in a long time. And this was one of the recipes that came up on Sprouted Kitchen Cooking Club this week. Sarah called it “Crunchy Lunchy Lentils.” This is the type of salad you make ahead. It can last for days in the fridge and generally (always) tastes better after it’s had time to sit for a day or so. I’ve made a few adjustments to the recipe but didn’t deviate all that much. I used a trio of green, brown and black sprouted lentils that cooked in 6 minutes versus French lentils that take about 20 minutes. I think my ratios of veggie to lentils were off a bit, I think there should have been more lentils, but it still worked out to a great salad regardless. 

This month has been pretty crazy. A few weeks ago there were a series of fires that erupted here in Oregon, then came a wind storm that blew all the smoke over here in Portland. We had to literally seal all the openings in the house because the air quality outside was hazardous, it was coming in from the fireplaces, any opening in the house, and remained like that for nearly 10 days. When that started I had already begun my project to paint the kitchen cabinets and countertop, the kitchen was in complete disarray but I had to move forward and get it done. We had air purifiers and fans running 24/7. It was pretty horrible happening on top of a pandemic, we couldn’t spend time outside at all. A lot of businesses and restaurants (that are already hurting) had to close, and there were some days where I couldn’t get grocery delivery or take-out, which was kind of big deal because we couldn’t use the kitchen much, everything was covered in drop cloths, so not much cooking other than microwaving something or eating sandwiches. I had prepared a couple of dishes in advance and was planning on grilling outside while the kitchen was unusable, but that didn’t work out. It was just one disaster layered on top of another. Many people lost their homes due to the fires, so we were lucky that we didn’t have to go through anything like that. I finished my kitchen project, the outside air cleared up and it rained and rained. And now we’re having a beautiful week of sunshine, with windows open and fresh air everywhere. But I feel a little PTSD from the smoke episode, all this sunshine and dry weather is dangerous this time of year, even with a burn ban people still do stupid stuff and light camp fires or whatever. I’m so afraid of new fires and that smoke coming back. It was just too much. I think I should just have a cocktail and enjoy a few rays of sunshine for now. And really, we had so much rain last week I think things are ok and I shouldn’t worry so much.

Anyways, if you’re still reading, I hope you enjoy this salad, it’s vegetarian and could be vegan if you skip the feta cheese, but I just love cheese in this salad. Enjoy!

crunchy_veggie_lentil_salad-2.jpg
crunchy_veggie_lentil_salad-3.jpg
crunchy_veggie_lentil_salad-4.jpg
crunchy_veggie_lentil_salad-5.jpg

Crunchy Veggie Lentil Salad

  • 3/4-1 cup of French / De Puy lentils

  • 2 Persian cucumbers (or a 1/3 of an English Cucumber) - seeded

  • 1 apple

  • 1 medium fennel bulb - fronds reserved

  • 1 small shallot or 1/2 large shallot

  • 1/2 cup of pecans (or walnuts) chopped

  • 1/3 cup feta or parmesan cheese (+ more for serving)

  • 1/2 cup of fresh mint leaves

  • 1/4 cup of fresh basil leaves

For the vinaigrette

  • 1 clove of garlic, minced

  • 1 lemon - juiced

  • 2 Tbsp. of apple cider vinegar

  • 1 Tbsp. of maple syrup

  • 3 Tbsp. of extra virgin olive oil

  • 1/2 tsp. of dried dill

  • 1/2 tsp. of coriander

  • flaky sea salt

  • fresh ground pepper

Rinse your lentils. Put them in a pot with 1 ½ cups of salted water or broth. Bring the liquid up to a simmer, put the cover on ajar and cook for 20 minutes until tender. (if using different Lentils, cook per package instructions) Fluff the lentils, and set them aside to cool completely.

While the lentils cook, fine dice the cucumbers. Core and finely dice both the apple and fennel and mince the shallot. Chop the herbs.

In the bottom of your mixing bowl, combine all the vinaigrette ingredients and whisk to combine. Add the cooled lentils, all your chopped vegetables, walnuts, cheese and herbs. Toss to coat. Chill in the fridge for at least an hour, the longer it sits the better it tastes! It will keep a few days in the fridge, so this is a great side dish or lunch throughout the week. Top with fennel fronds when serving.

Homemade Greek Yogurt

homemade_greek_yogurt-1.jpg

I’ve been wanting to get this Homemade Greek Yogurt up on the blog for a while now as I’ve been making it on repeat for the past few months, along with this granola and focaccia, all three are so good, and so much better than store bought. They’re all made with basic ingredients that you would have on hand. This yogurt is very easy to make with an Instant Pot, it just takes time. Your hands-on time is maybe 30 minutes total, but beginning to end it takes about 12 hours.

As for milk, I’ve been buying organic whole milk. I get organic because it lasts much longer in the refrigerator. The days of running out to the store for a half-gallon of milk are over for now, so I always try to have an extra tucked in the back of the refrigerator. 

The first time you make this you’ll have to keep an eye on the cool down part until you know how fast your yogurt is cooling. I use an ice bath and it takes 15 minutes. If you don’t use an ice bath it can take an hour or longer to cool down, and you will have to keep checking the temperature over and over again. So for me it’s easier to do an ice bath and set a timer and be done with it.

I generally start this in the evening so that it can incubate overnight. It’s nice to wake up in the morning and have something done! I do that with the Focaccia as well, I let it rise overnight and bake it in the morning.

The only thing that makes “Greek yogurt” different from regular yogurt is that it’s strained (notes in recipe). It’s richer and creamier. It takes a little more time, but it’s worth it. 

homemade_greek_yogurt-2.jpg
homemade_greek_yogurt-3.jpg
homemade_greek_yogurt-4.jpg
homemade_greek_yogurt-5.jpg

Homemade Greek Yogurt

  • 1/2 gallon of whole milk (8 cups)

  • 2 tablespoons yogurt 

Essential Equipment

Boil

Pour the milk into the Instant Pot, cover the pot (the float valve position won’t matter) and set to yogurt, then press adjust (boil should appear in the digital display), it will take about 20-25 minutes to finish. When it’s done remove the pot and turn off the Instant pot. 

Cool down

You want to cool it down to 115°F. An ice bath helps speed up the process, without an ice bath it may take an hour or so, but what I do is put the instant pot in a 9x13 glass pyrex baking pan, load it up with ice, and it cools down in about 15 minutes. You’re aiming for a temp between 110°-115°.

Once it reaches that temp remove it from the ice bath immediately and place it on a towel, drying the bottom of the pot. 

Skim

Skim off the top skin and discard it.

Add Yogurt

Whisk in 2 tablespoons yogurt into the milk so it’s well combined.

9 hour incubation

Place the pot back into the Instant Pot, place your cover on and set to Yogurt. This defaults to 8 hours, I’ve found better results after 9 hours but it can be done in as little as 8 hours. Use the + button to increase the time (you can even go longer if you want, up to 12 hours).

Ready to strain

When the timer goes off, remove the pot. At this point you can refrigerate it and eat it as regular yogurt. But I highly recommend taking the next step and straining it, The texture is so much better!

Set out a large bowl or pot with a strainer over it (set it so there is space between the bottoms and it can strain properly), then put a large piece of cheese cloth over the strainer. Scoop out the yogurt into the cheesecloth. Fold the ends of the cheesecloth over the yogurt to cover. Place in the refrigerator for an hour or two. The longer you strain the thicker the yogurt will be. I really like the texture after an hour or a bit longer. I’ve let it strain for two hours and it was almost too thick, but you might like it that way! I would experiment with different strain times to see what you like best. Once it’s strained scoop out the yogurt into a container, whisk it until smooth and refrigerate, it will last a good 2+ weeks in the refrigerator. You can discard the whey (the liquid strained out) or you can keep in the refrigerator and use this to make more yogurt. I haven’t tried that but I read that it works just as well.

Cherry Crumble pie

cherry_pie_crumble_topping-1.jpg

We had such a nice surprise a few weeks back. We have a cherry tree in our front yard that has been here ever since we bought the house several years ago, but it never really produced much fruit. Maybe a few at the very top for the squirrels to eat. But this year was a different story. Tons of cherries and within reach! So Jeff and I spent an afternoon picking cherries in our front yard. We ended up with about five pounds of cherries! We pitted and froze about half, and the other half I made into a pie which came out incredibly good! The recipe below is for a full-size pie that I made a few weeks ago, but you can make four mini-pies instead which is what I did this week. One thing I noted below in the recipe is to bake the pie in the lower third of the oven. Rather than pre-bake your pie shell to avoid “soggy bottom” you can refrigerate the rolled out pie dough in the pie pan prior to baking, add your filling and bake on the lower rack and it will brown the bottom. That is if your oven heats from the bottom up. I had read about this somewhere and tried it and it worked really well! Recipe below, enjoy!

cherry_tree-1.jpg
cherry_pie_crumble_topping-2.jpg
cherry_pie_crumble_topping-3.jpg
cherry_pie_crumble_topping-4.jpg
cherry_pie_crumble_topping-5.jpg

Cherry Crumble pie

Crumble:

  • 2/3 cup rolled oats

  • 1/2 cup all-purpose flour

  • 1/2 cup brown sugar

  • 1/4 teaspoon ground cinnamon

  • 1/4 teaspoon Cardamom 

  • 1/2 teaspoon kosher salt

  • 6 tablespoons unsalted butter, melted and cooled

Sour cherry filling:

  • 3/4 cup sugar

  • 3 tablespoons cornstarch

  • 1/4 teaspoon kosher salt

  • 2 1/4 pounds fresh sour cherries, pitted, or 2 pounds frozen sour cherries, partially thawed

  • 1 Pie Dough, recipe here

Prepare your pie crust in advance so it’s well chilled. Roll out your pie dough, place in pie dish, cover with plastic wrap and refrigerate for at least 1 hour. 

Preheat oven to 375°. 

Prepare the cherry filling by mixing sugar, cornstarch and salt together in a medium bowl, then toss in the cherries until well coated.

In another medium bowl whisk together the oats, flour, brown sugar, spices and salt. Pour the cooled melted butter over the flour mixture and stir to combine well (sometimes it’s easier to do this with your hands).

When the pie crust is good and chilled, pour in the cherry filling mixture, then top with the crumble mixture. Place the pie on a baking sheet and bake for 50-60 minutes on the bottom third of your oven (this helps the bottom crust to cook better). About 45 minutes for the mini-pies. Remove from oven and cool before serving.

Recipe adapted from Smitten Kitchen

Sourdough Focaccia with Flaked Sea Salt

focaccia-4.jpg

Sourdough Focaccia with Flaked Sea Salt. Sourdough is totally new to me, for years I thought to try it out but felt intimidated by the whole process. And it is a process! But not nearly as bad I was expecting, I’m enjoying it quite a bit. A few weeks ago I got the sourdough starter from a local pizzeria, Red Sauce Pizza, I was purchasing flour and yeast there and they offer a free sourdough starter with purchase. They actually forgot to include it in my bag, I contacted them and they delivered it to my house the next day! That was so nice.

I put the starter (which was super sticky and not bubbly) in the fridge and fed it a few days later, then it started up! I kept it in the fridge and fed it once a week and had no problems at all. 

The recipe below is from Alexandra Cooks and I highly recommend going to her blog, she has so much experience and information that I couldn’t possibly explain here since this is so new to me.

The main things I want to point out about sourdough bread making:

  • It’s not as complicated as it seems

  • You don’t have to buy a sourdough starter, ask your neighborhood bakery, family, friends or neighbors, they’re all throwing away starter discard! .

  • You can feed the refrigerated sourdough starter every 1-2 weeks to keep it active

  • It’s mainly hands off, most of the time is letting it rise

  • This focaccia definitely needs a non-stick pan like this USA Bake pan

  • It’s totally worth it because the bread is amazing!

You may have seen on my instagram feed that I made some Focaccia for a fund raiser through The Side Yard Farm.

This week I’m participating in @bakersagainstracism with @thesideyardfarm’s local bake sale here in Portland to support Black United Fund of Oregon! 100% of the proceeds from this event will be going directly to BUFOR to aid in their mission to directly fund social and economic development initiatives in the underserved communities of Portland. I’ll be baking this Sourdough Focaccia with flaked sea salt.The bake sale will run from 11am Monday 6/15 through Friday 6/19. Pick-up of all purchased items will be at The Side Yard Farm on Saturday 6/20 between 10am-4pm, no shipping or delivery available.

Here’s where you can pre-order, it looks like a lot of great baked goods on the site! 

https://pdx-bakers-against-racism.square.site

It’s now Wednesday and they’re nearly sold out of everything! More baked items are being added I’m told and they are also accepting donations.

Just a friendly reminder when you pick up your baked goods be sure to wear a mask! Coronavirus cases are on the rise here in Oregon and we all want this to go away as fast as possible!

Below is the recipe for this fantastic Focaccia! 

focaccia-1.jpg
focaccia-3.jpg
focaccia-2.jpg

Sourdough Focaccia with Flaked Sea Salt

  • 50 g – 100 g (1/4 to 1/2 cup) active sourdough starter

  • 10 g (about 2.5 teaspoons) kosher salt

  • 430 – 440 g water, room temperature (about 100°F)

  • 512 g (about 4 cups) bread flour

  • 3 tablespoons extra-virgin olive oil, divided, plus more for drizzling

  • Flaky sea salt, such as Maldon

I recommend watching her video here, it helped me a lot! 

Place the starter, salt, and water in a large bowl. Stir with a spatula to combine — it doesn’t have to be uniformly mixed. Add the flour. Mix again until the flour is completely incorporated.

Perform one “fold”: 30 minutes after you mix the dough, reach into the bowl and pull the dough up and into the center. Turn the bowl quarter turns and continue this pulling 8 to 10 times. 

Drizzle with a splash of olive oil and rub to coat. Cover bowl with a tea towel or bowl cover and set aside to rise at room temperature (70ºF/21ºC) for 4 to 18 hours (the time will vary depending on the time of year, the strength of your starter, and the temperature of your kitchen — in summer, for instance, sourdoughs double in 6 hours; in winter, they double in 18 hours. A straight-sided vessel makes monitoring the bulk fermentation especially easy because it allows you to see when your dough has truly doubled. You will also see bubbles in the dough which is a good sign that it is ready.

When dough has doubled, place 2 tablespoons of olive oil into a 9×13-inch pan (use a non-stick pan if possible or guess what, it will stick!).

Drizzle dough with a tablespoon of olive oil. Use your hand to gently deflate the dough and release it from the sides of the bowl. Gently scoop the dough into the center of the pool of oil in your prepared pan. Fold dough envelope style from top to bottom and side to side to create a rough rectangle. Turn dough over so seam-side is down. (watch her video for better reference).  

Rub top of dough with oil. Leave alone for 4 to 6 hours (At this point you can also put it in the refrigerator overnight for a slow rise, just take it out prior to baking and proceed as below instructions, you will get a higher rise and I think it’s better!), uncovered, or until puffy and nearly doubled.  

Heat oven to 425ºF. Rub hands lightly with oil, and using all ten fingers, press gently into the dough to dimple and stretch the dough to nearly fit the pan. Sprinkle generously with a flaked sea salt. Transfer pan to the oven and bake for about 25 minutes or until golden all around. Remove pan from oven and transfer bread to a cooling rack. Cool at least 20 minutes before slicing.

Adapted from Alexandra’s Kitchen

Black Forest Cake

black_forest_cake-1.jpg

Black Forest Cake. or rather a Black Forest Gateau. Gateau just means cake with cream and fruit filling. I didn’t know that so thought to pass that along. I asked Jeff what kind of cake he would like for his birthday and he showed me this Black Forest Gateau on BBC good food. It looked amazing! I searched around for other recipes online and came up with the one I’m posting here. I’m really happy with the results so decided to take some photos and do a blog post. The cake part of the recipe is from Call Me Cupcake and the rest, the filling and topping, is from my previous cake recipes, with the exception of the brandied cherries which I sort of made up, there are so many different ways to make them, but they came out really good! It’s not cherry season so I used frozen cherries. I couldn’t find any Bada Bing cherries in a jar (I didn’t need 6 jars!), which would have looked nice on top of the cake, but I just worked with what I could find. It’s weird these days why it’s hard to find certain things, not just toilet paper but jalapeños at Whole Foods? None? Really? oh well. We just have to make do with what we have and appreciate what we do have. 

I’d like to think of this as a beautiful mess. It came out much messier than I expected, I wanted a few drips of ganache down the sides and it proceeded to pour over like a waterfall out of control. But hey that’s ok. Jeff sort of marveled at all the layers and things going on. Puddles of chocolate? Who can complain about that. This cake will make you smile, I promise. Most of this is make-ahead-recipes so it’s quick to assemble on the day your serving it. You really could make everything the day before, then just warm the ganache, assemble and chill before serving.

Oh, I just remembered, another thing I couldn’t get with my grocery delivery was Mascarpone for the frosting. So I ordered an extra pint of whipping cream and made it myself, you can find the recipe here, it’s very easy to make. It needs to strain for at least 12 hours so it’s best to do it at night and it will be ready the next day. I’m finding all these weird things I’ve made over the years coming in very handy lately!

black_forest_cake-2.jpg
black_forest_cake-3.jpg
black_forest_cake-4.jpg
black_forest_cake-5.jpg
black_forest_cake-6.jpg

The Cake

  • 4 ounces butter, 1 stick

  • 2 1/2 cups all purpose flour

  • 3/4 cup cocoa powder

  • 2 teaspoons baking powder

  • 2 teaspoons baking soda

  • pinch of salt

  • 2 cup granulated sugar

  • 2 large egg

  • 1 1/3 cup sour cream

  • 3/4 cup hot water

Heat oven to 350°F (175°C). Butter and flour three parchment-lined 9-inch cake pans. Cut the butter into chunks and melt in the microwave or stove top and set aside to cool.

Sift the flour, cocoa powder, baking powder and baking soda in a large bowl, stir to combine. Add the salt, sugar, eggs and sour cream, whisk together, then slowly whisk in the melted butter and hot water (so you don’t cook the eggs!) Stir until completely smooth. Divide the batter between the three prepared cake pans.

Bake for 25-30 minutes until the center is set and a test knife comes out clean. Let the cakes cool for 10 minutes in their pans before inverting them onto a cooling rack. Let cakes cool completely, wrap in plastic wrap and refrigerate for at least an hour before assembling. Cakes can be made ahead and refrigerated.

The Cherries

You could buy brandied cherries and use straight from the jar but I couldn’t find any. I had frozen cherries so this is how to prepare either frozen or fresh cherries.

  • 1 pound frozen cherries (defrosted in refrigerator)

  • 1 cup brandy

  • 1/2 cup water

  • 1/4 cup sugar

Add the cherries, brandy, water, and sugar to a small saucepan and heat over medium until the sugar has dissolved. Simmer for 15 minutes and remove from stove, allow to cool and refrigerate in sealed container. 

The Mascarpone Whipped Cream Frosting

  • 1 cup mascarpone

  • 1 cup heavy whipping cream

  • 1 tablespoon granulated sugar

  • 1/2 teaspoon vanilla extract

Beat together the mascarpone, whipping cream, sugar, and vanilla extract in the bowl of a stand mixer fitted with a whisk attachment at medium high speed until fluffy, about 1 to 2 minutes. Refrigerate until ready to use.

The Ganache

  • 2 ounces dark chocolate, chopped finely (or semi-sweet chocolate chips)

  • 1/4 cup heavy cream

  • Plus more dark chocolate for shaving on top of cake later

Place the chopped chocolate in a bowl. Heat the cream over a medium heat until just simmering, then pour over the chocolate, allow the chocolate to melt for a bit then whisk briskly until well combined. Set aside. (this should be your last step in cooking before assembling the cake)

Assemble!

Place your first layer of cake on a cake stand or plate. Spread a good amount, about 1/2” thick with the mascarpone frosting. Top that with almost half the brandied cherries. Place your second layer of cake and repeat with mascarpone frosting and cherries, but leaving a few cherries aside for the final top, unless you have extra fresh or jarred cherries to use. Place your final cake layer on top of that, then pour on the ganache, let it dribble down the sides of the cake. Add some chocolate shavings on top (a vegetable peeler works great for shavings) and add the remaining cherries. Chill well, at least an hour, before slicing. It’s kind of a mess, but a good mess!

Photo by Jeff McDonald

Photo by Jeff McDonald

Peanut Butter and Chocolate Blondies

peanutbutter_chocolate_blondies-1.jpg

Peanut Butter and Chocolate Blondies. These are so good! I made them about a week ago and they’re all gone now. Jeff and I finished the last one today. The serving size I show here can be a bit much (or not!), so I ended up cutting the nine squares in half for 18 pieces total. It’s a nice snack size. I had been craving peanut butter and chocolate for like two weeks and I finally made this recipe. The original recipe was more of a thin bar, baked in a 9”x13” pan for 20 minutes, but I wanted something at least an inch thick so I baked them in a 9”x9” pan for about 40-45 minutes and they came out great. What I like about this recipe is that there is an extra layer of peanut butter inside, not a lot but enough to make it really good! 

I hope you are all getting along well, we’re fine here and I’ve been working on the garden a bit more, I’ve started some herbs and vegetables from seed, which I might blog about if it all works out, I’m learning all the time over here. But so far so good. It has been a bitch trying to buy seeds online, either no stock or way overpriced on Amazon, but my local nursery was well stocked with curbside pickup, and my neighbor gave me some seeds for Parsley, Dill and Cilantro. I used to buy starters for herbs, but some tend to bolt sooner than you want, so it’s better to just grow by seed and stagger the planting (seeding) so you always have a fresh harvest. 

This recipe is pretty easy and straight forward, like I said I used a smaller baking pan for a longer oven time and was really happy with the results. But you could try the 9”x13” dish for 20 minutes.

If you love chocolate and peanut butter you will love this! I do!

peanutbutter_chocolate_blondies-2.jpg
peanutbutter_chocolate_blondies-3.jpg
peanutbutter_chocolate_blondies-4.jpg
peanutbutter_chocolate_blondies-5.jpg

Peanut Butter and Chocolate Blondies

  • 1 1/2 sticks (3/4 cup) salted butter

  • 3/4 cup creamy peanut butter, divided into 1/2 cup and 1/4 cup

  • 1 cup light brown sugar

  • 1/2 cup granulated sugar

  • 2 eggs

  • 1 tablespoon vanilla extract

  • 2 cups all-purpose flour

  • 1 teaspoon baking powder

  • 1 cup semi-sweet chocolate chips

  • flaky sea salt

Preheat the oven to 350 degrees F. Grease a 9x9 inch baking dish lined with parchment paper.

In a medium sized pot melt together the butter and 1/2 cup peanut butter over a medium heat on the stove, stirring frequently until melted. Stir in the brown sugar, sugar, and vanilla, transfer to a large bowl and then whisk in the eggs gradually to temper them so that they don’t cook. Stir in the flour and baking powder until well combined. Transfer the bowl to the freezer and chill 5 minutes or the refrigerator for 15 minutes, until the dough is no longer warm to the touch. Stir in the chocolate chips. 
Spread 1/2 the dough out in the prepared dish. Dollop and swirl the remaining 1/4 cup peanut butter over the dough. Add the remaining dough overtop, don't worry if it doesn’t fully cover the peanut butter. Transfer to oven and bake for 40-45 minutes, until set in the center. Remove from the oven and sprinkle with sea salt. Let cool and then cut into bars. Store for up to 5 days in an airtight container.

Adapted from Half Baked Harvest

Champs Elysées Cocktail

champs_elysees_cocktail-1.jpg

I’ve been watching David Lebovitz’s live instagram stories for the past few weeks, not every day but quite frequently. They start at 6pm Paris time which is 9am pacific time here. That’s Apéro hour in France, the equivalent of happy hour in the U.S. But at 9am I’m not always wanting to think about french cocktails that early. He’s promoting his new book Drinking French, and I’ve been learning quite a bit each episode. 

I saw one not too long ago featuring this Champs Elysees cocktail with his guest Margot Lecarpentier, who owns a bar in Paris. Apparently she’s sort of a rock star in the bartending world. Honestly this drink is so good I can understand why. It’s kind of a sweet and sour flavor, it tastes a lot like a green apple Jolly Rancher candy. I kid you not. It’s so delicious!

Her recipe is all in milliliters so I did my best to translate to ounces, but some ml measurements don’t really translate well into ounces so figured out the teaspoon or tablespoon measurements which worked out a little easier. For example 40 ml equals 1.35256 oz. I rounded up on all the measurements and it worked out fine. 

A few thoughts on liquor because some liqueurs and spirits can cost quite a bit and I didn’t want to spend a fortune trying out a new cocktail.

I did a phone order with a local liquor store and asked for the small bottle of Chartreuse, I think it was 375ml, but when I got there they said they were out of stock so she asked if four tiny bottles (50ml) were ok, and I mumbled underneath my mask that it was fine. These small bottles might be a good option if you just want to try some new cocktails without investing in the larger bottle. I think they were about $6 a bottle. 

Apple brandy. The original recipe called for Calvados which can get a little pricy too, so I ordered E&J apple brandy, it’s inexpensive and tastes very very good! So you don’t have to break the bank to have a good cocktail!

Oh, and the original recipe tops the drink with a dash of Angostura which I’m out of so I skipped it, you can try that if you like.

Hope you are all well as we continue to stay home and keep a distance. I’m being super careful when I go out which is about once a week. And thanks so much to any of you that work in healthcare or in the service industry. Cheers!

champs_elysees_cocktail-2.jpg
champs_elysees_cocktail-3.jpg
champs_elysees_cocktail-4.jpg
champs_elysees_cocktail-5.jpg
champs_elysees_cocktail-6.jpg
champs_elysees_cocktail-7.jpg

Champs Elysées Cocktail

  • 25 ml  (1 oz) (about 1/2 lime) lime juice

  • 10 ml (.5 oz or 2 teaspoons) simple syrup 

  • 15 ml (.75 oz or 1 tablespoon) chartreuse green 

  • 40 ml (1.5 oz) calvados or apple brandy

Pour all the ingredients into a cocktail shaker with a few cubes of ice, give it a good shake and strain into a small cocktail glass. Garnish with lemon peel. Top with dash Angostura bitters (optional)

Black-Eyed Peas + Collard Greens

black_eyed_peas_collard_greens-1.jpg

Here’s the Black-Eyed Peas and Collards Greens that I made last week, I think I mentioned it in my Cornbread post, which seems so long ago. Man, these are weird times. I did some shopping yesterday morning because it’s getting so difficult to get delivery, or to get what you want, Amazon PrimeNow is really feeling it these days with low inventory, so I got my disposable gloves, sanitizer, dust mask and went to it. Well the mask didn’t work out at all, it kept fogging up my glasses and I couldn’t see. So that had to go. But I will say the majority of shoppers were really good about keeping distance. And the cashier was sanitizing everything after each customer. I brought my own bags so I had bag myself which was fine, and it felt good to be out for a bit (there is this sense of walking through a minefield, constantly cautious!) But we have groceries for a good one to two weeks and it gives me peace of mind that I don’t have to go out there for a while.

So onto Black-Eyed Peas and Collards Greens. I got the recipe from NYT Cooking. The original recipe had two pounds of black-eyed peas and two pounds of ham, so I halved the recipe, some things I left as is, like the spices, because you might need to add more water as it’s cooking and I found myself adding more spice towards the end. The recipe below makes a ton of food, at least for two people that is, but if you want to make an even bigger batch you can double the peas and ham, double the garlic, keep everything else the same and use 10 cups of water for cooking rather than 7 cups. I initially started with 5 cups of water since I halved the recipe, but it wasn’t enough to cover everything. I think the recipe is fairly forgivable in precise measurements so you can add and subtract however you like and it will be fine. We really enjoyed this dish, I hope you do too. 

black_eyed_peas_collard_greens-2.jpg
black_eyed_peas_collard_greens-3.jpg
black_eyed_peas_collard_greens-4.jpg
black_eyed_peas_collard_greens-5.jpg

Black-Eyed Peas + Collard Greens

  • 1 pounds black-eyed peas, soaked overnight if possible

  • 1 pound smoked thick-cut bacon (or smoked ham hock)

  • 1 teaspoon kosher salt

  • 1 large onion, peeled and stuck with 2 cloves

  • 1 bay leaf

  • 1/2 teaspoon black pepper

  • 1/2 teaspoon allspice

  • 2 tablespoons olive oil

  • 2 garlic cloves, minced

  • ½ teaspoon crushed red pepper

  • 2 pounds collard greens, cut in 1-inch ribbons (about 8 cups)

  • 1 bunch scallions, cleaned and chopped, for garnish (optional)

Drain peas and put them in a large Dutch oven or heavy-bottomed soup pot. Add ham hock or bone (if using slab bacon, cut it into 2-inch chunks), cover with 7 cups water and turn heat to high. Add salt, onion stuck with cloves, bay leaf, black pepper and allspice.

Bring to a boil, then reduce heat to a gentle simmer. Skim off and discard any foam that rises to the surface. Simmer for 1 1/2 to 2 hours, until peas are tender (I cooked mine over 2 hours and the bacon started to fall apart, so I think 2 hours max if you’re using bacon). Throughout cooking, add water as necessary, always keeping liquid level 1 inch above surface, stirring with wooden spoon occasionally. Turn off heat. Check broth for salt and adjust seasoning. Mixture should be fairly brothy. With a pair of tongs, remove ham hock, ham bone or bacon. Chop meat and skin in rough pieces and set aside.

Put a large wide skillet over medium-high heat. Add olive oil and heat, then add garlic and red pepper and let sizzle without browning. Add collard greens and stir to coat. Season with salt and add 1 cup water, stirring to help wilt greens. Add chopped bacon and reduce heat to medium, then cover with lid slightly ajar and cook until greens are soft, about 20 minutes. Check seasoning.

To serve, put greens and meat in low soup bowls, then ladle over hot black-eyed peas. Sprinkle with scallions.

Recipe adapted from NYT Cooking