Cornbread

corn_bread-1.jpg

How is everyone doing? We’re ok here, adapting to the stay at home rule. Granted, Jeff and I have been working from home for some time now so this wasn’t any kind of huge transition, but staying away from grocery stores, restaurants and people has proved to be more challenging than I expected. Last week we could not get deliveries through Amazon PrimeNow for several days, rather than the same-day 2-hour window we’ve relied on. And all delivery services had massive delays. I was down to two eggs by the weekend and figured I would have to go to the grocery store. But I was able to find a local grocer that uses Instacart for delivery service and got a delivery on Saturday night! I was so happy. It really is the little things in life, like food! I’m trying to reserve my trips out to the store for only things I can’t get online or get delivered (hello Bourbon!). The less contact we have now the faster we can get through this Pandemic, and hopefully return to something somewhat normal. But I think that will be a long time from now. We’ll be toting around hand sanitizer until we’re like “Corona who? what?” Well, that day will never come because nobody in the whole world will forget this.

So, Cornbread! This recipe is adapted from Sprouted Kitchen Cooking Club. I’ve made Cornbread maybe a few times and it’s generally, ok. Nothing to blog about. But I’m really happy with how this came out. Not sure if it’s the type of cornmeal I used or what, I get very confused about cornmeal, there are so many different kinds, fine, medium, course, corn grits, corn polenta, grits/polenta, Masa Harina, it’s almost endless. I had Course Grind Cornmeal on hand so I used that. I was worried the texture would be too sandy, but it came out great, I really love it.

I made a couple adjustments to the original recipe, I didn’t have a can of green chiles and I forgot to add the cheese! I’ll keep those in the recipe as optional. I added some defrosted frozen corn which I highly recommend. Also Sarah’s recipe is for Cornbread Muffins, I’ve adjusted the recipe for a 10” cast-iron skillet, but you could make muffins instead, it will be about 10 minutes less bake time.

I made this for a Black-eyed Peas and Collard Greens dish we had the other day and I’ll be posting that recipe soon, it tasted so good! Take care friends.

corn_bread-2.jpg
corn_bread-4.jpg

Cornbread

  • 1 1/4 cup buttermilk or to make it: mix in 1 tbsp white vinegar to 1 1/4 cup milk

  • 2 eggs

  • 1/3 cup avocado oil or other neutral oil

  • 3 Tbsp. butter or ghee, melted

  • 1/2 tsp. sea salt

  • 1/3 cup cane sugar

  • 1 cup cornmeal (course grind)

  • 1 cup all-purpose flour

  • 2 tsp. baking powder

  • 1 tsp. baking soda

  • 1 cup frozen corn, defrosted to room temp

  • 1 4 oz. can mild green chiles, drained well (optional)

  • 3/4 cup grated cheddar cheese (optional)

  • A grind of fresh ground pepper

Preheat the oven to 375’ and grease a 10” cast-iron skillet or equivalent baking dish. 

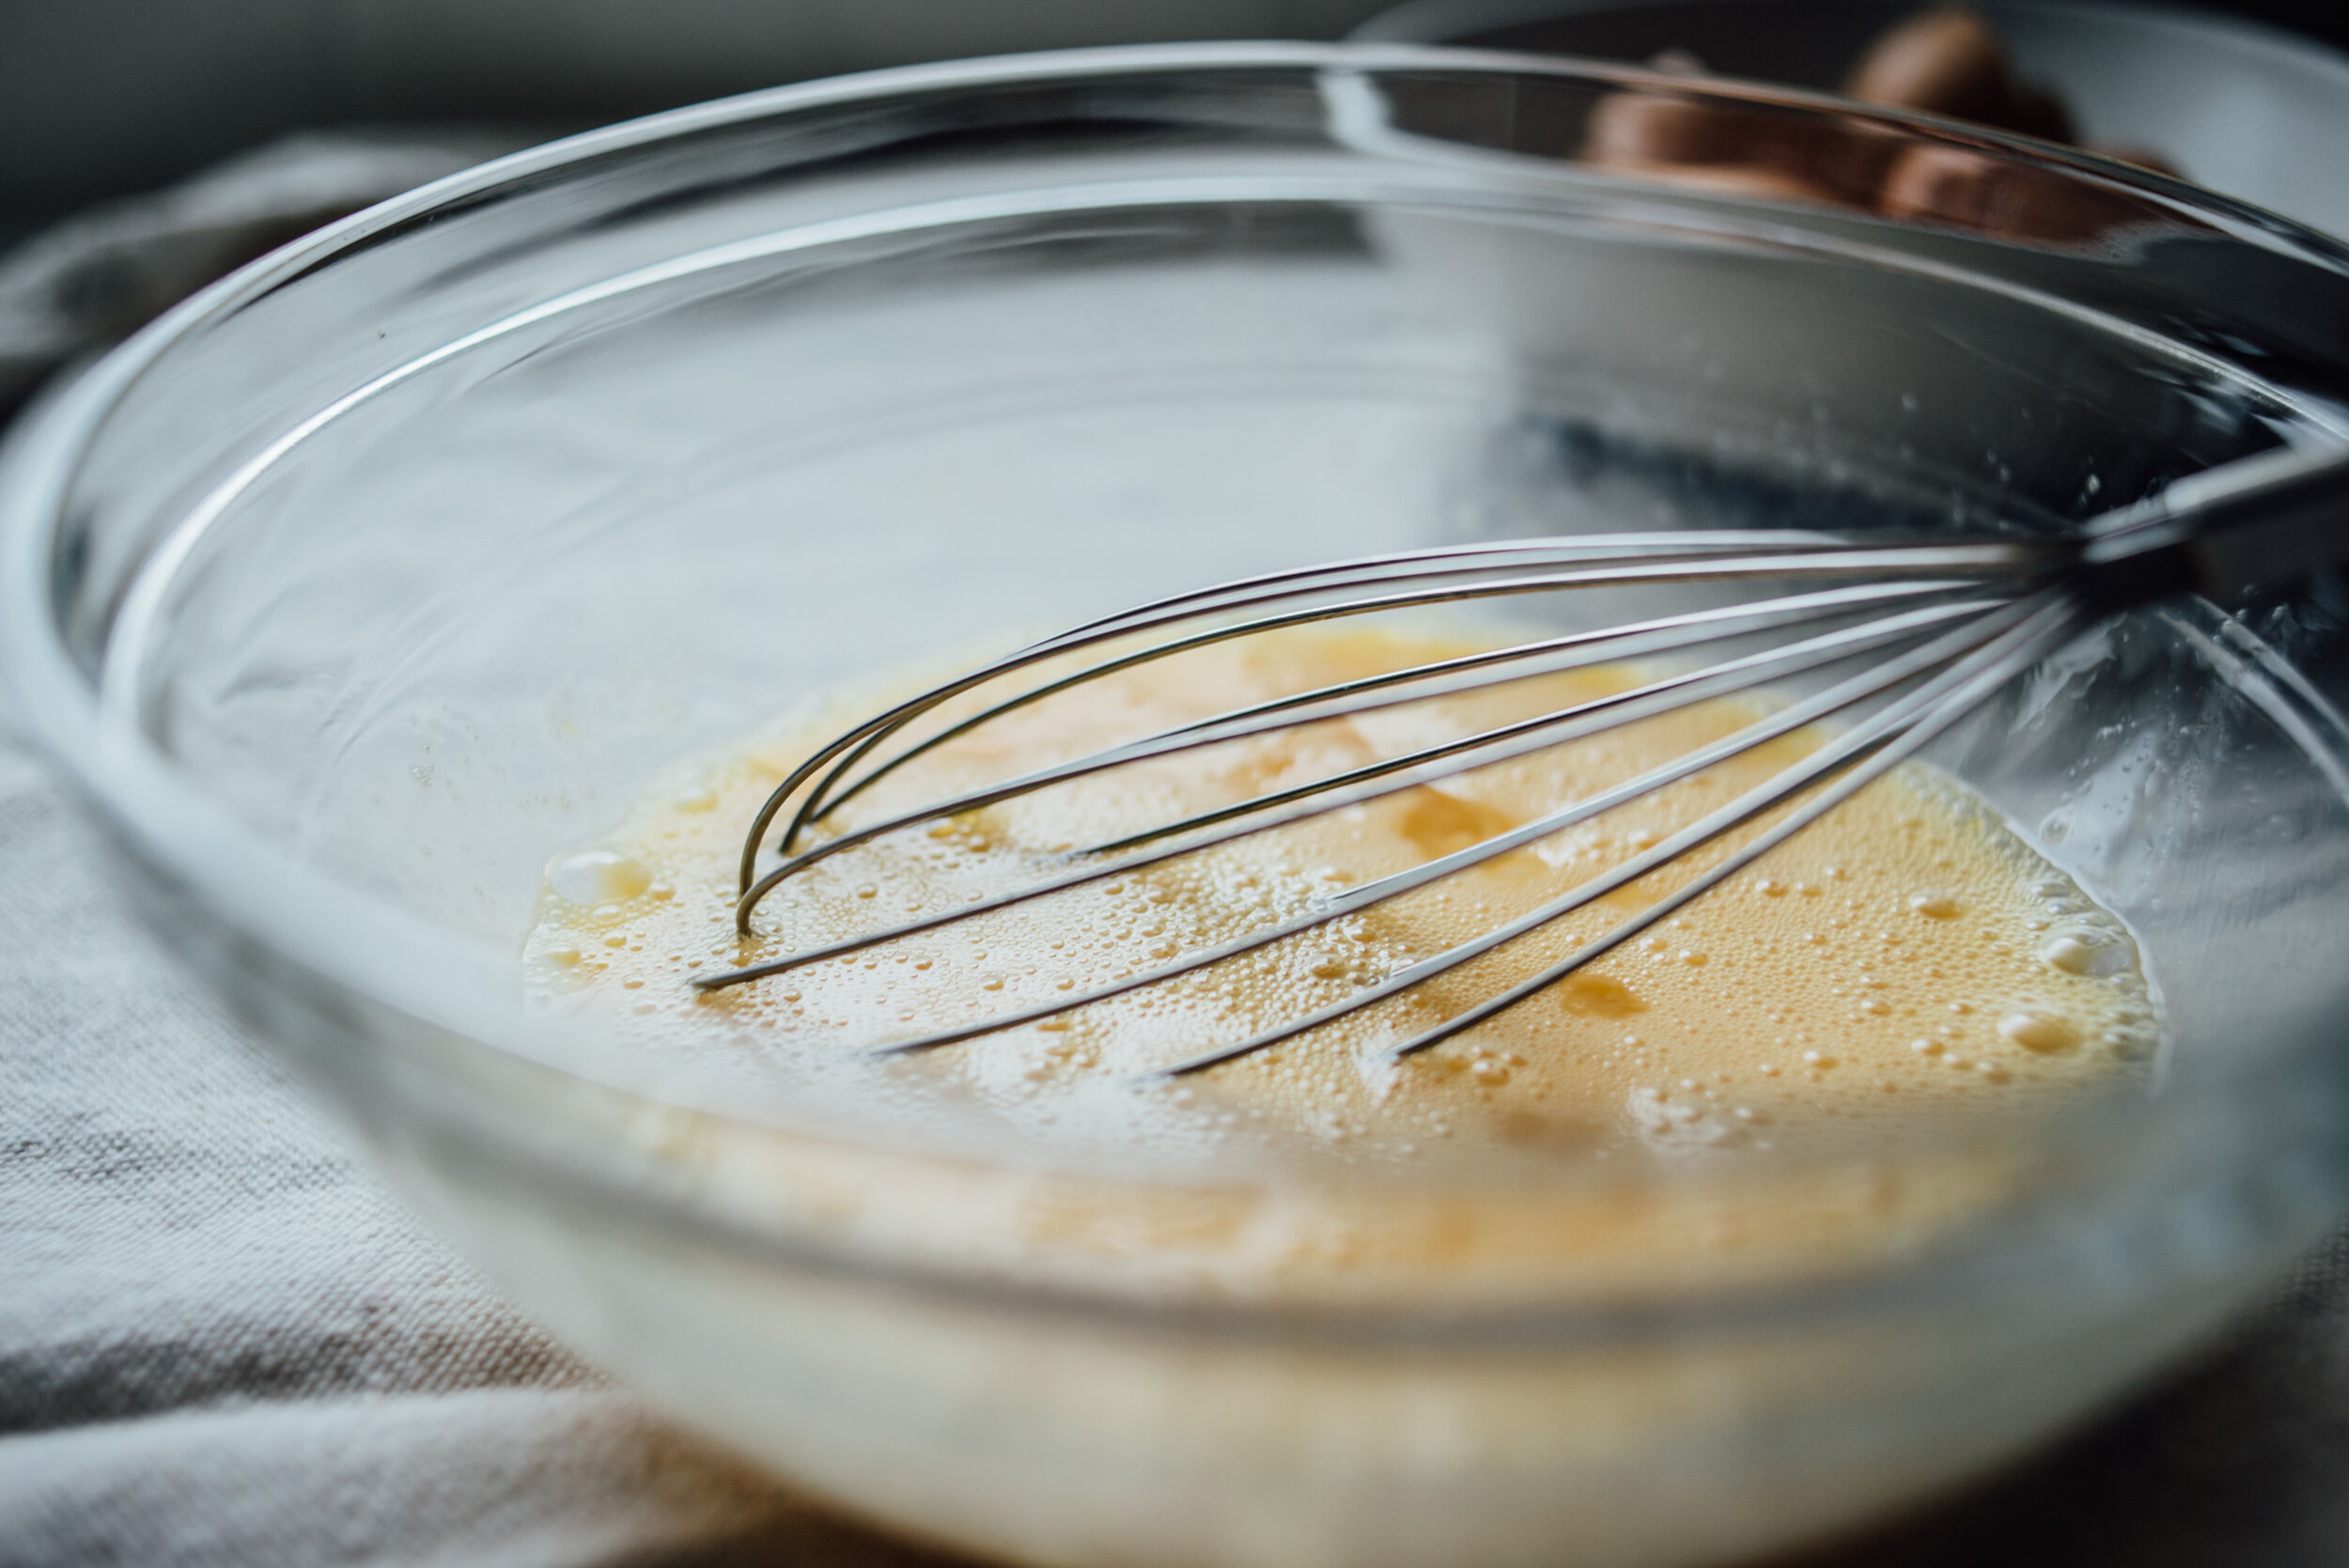
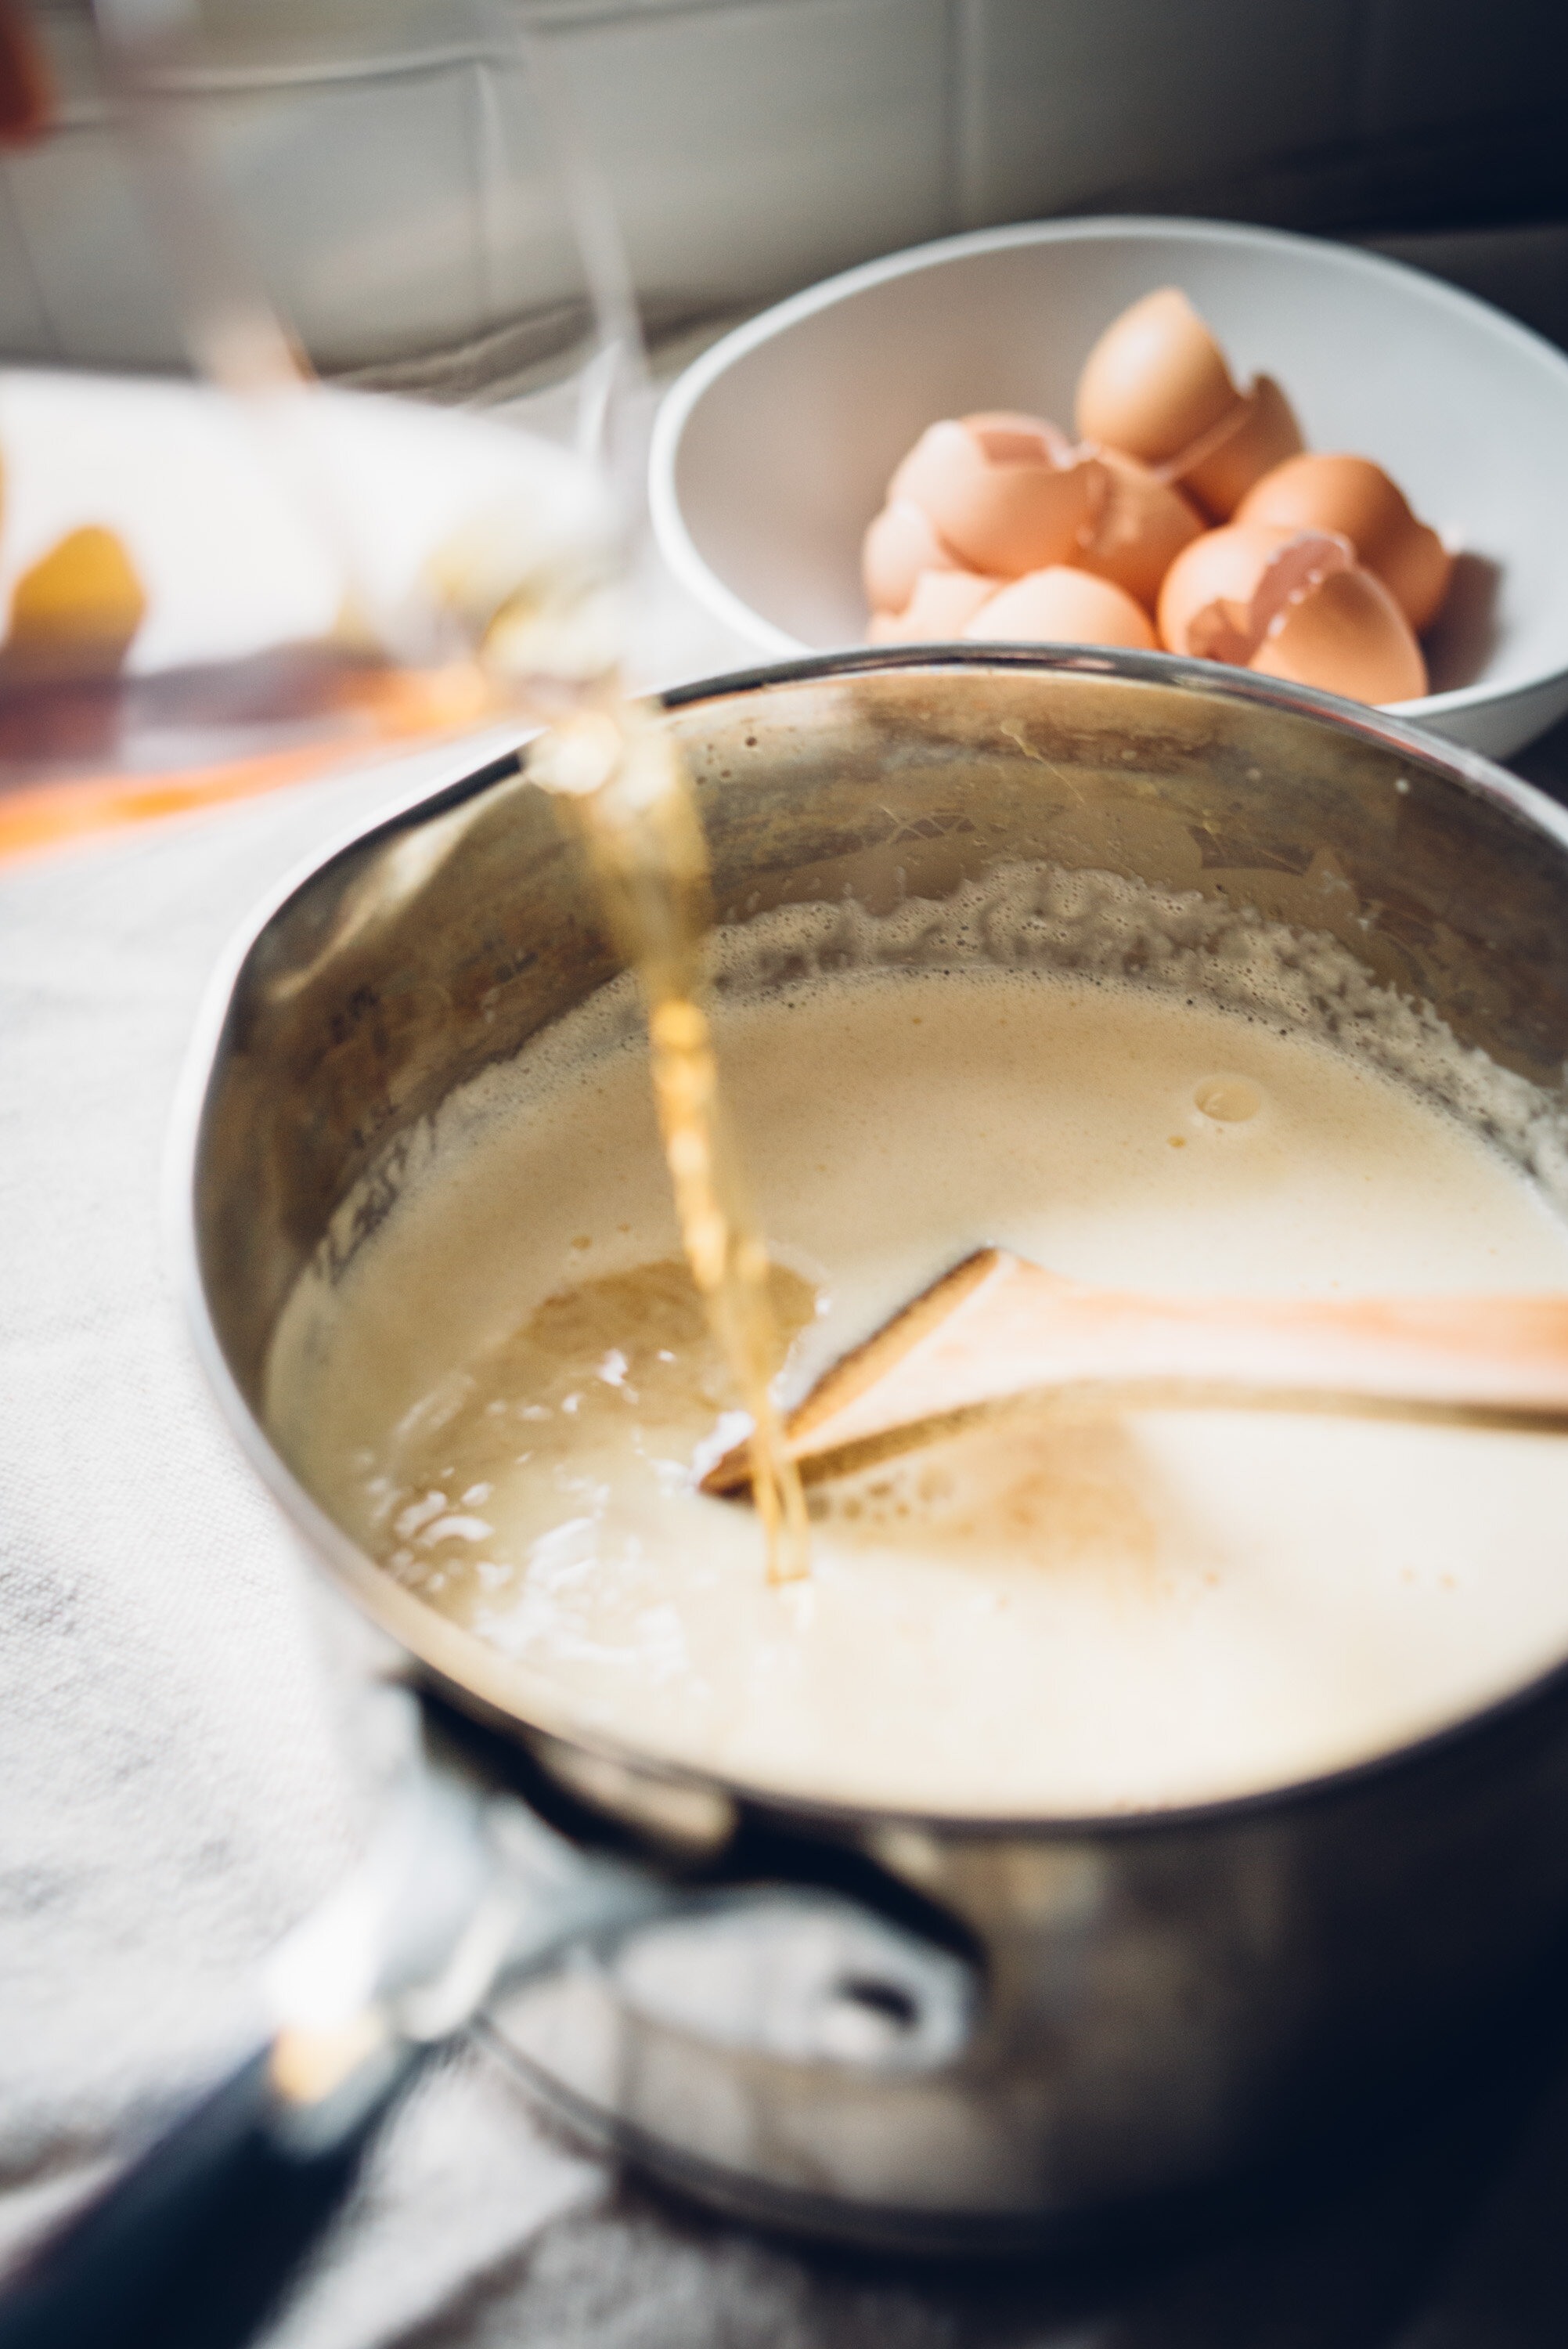
In a large mixing bowl, whisk the buttermilk and eggs together really well. Add the oil, melted butter, salt and sugar and whisk until combined. In a separate medium bowl, whisk together the cornmeal, flour, baking powder and baking soda. Add the flour mixture to the wet ingredients, stir to just combine. Add the corn and some fresh ground pepper. (if using add the drained chiles, cheese and stir one more time). 

Pour into the cast-iron pan, top with a bit of sugar or honey if you like. Bake for 30 minutes or until done in the center (muffins will take 20-25 minutes). Remove and allow cool. 

White Bean and Bacon Soup

white_bean_bacon_soup-1.jpg

So here we are. In a global Pandemic. Is this really happening? Yep. So before I talk about this recipe I want to talk a bit about what’s going on. I was reading the other day how historically people tend to dismiss pandemics early on, whether it was the plague in the 14th century, the flu in 1918 or more recently the AIDS epidemic to where we are now with the Coronavirus. There are still people in denial. I admit I had some skepticism early on, but by the last couple weeks of February I started to not touch door knobs in public places and not touch my face. I had jury duty on March 4th and was armed with hand sanitizer and tissues to avoid touching doors or whatever. It was clear at the time that this is not going away by wishful thinking or hopeful optimism. I started some reasonable shopping last week and went to Costco last Tuesday for our usual stuff, it was remarkably calm there and not too busy, they had already implemented cleaning procedures, as soon as you entered they sprayed down the handle of the shopping cart, and throughout the store I saw employees cleaning the handles of refrigerator doors. It gave me hope and confidence that we can get through this with a smart strategy. And we can! But we have to take this seriously to do so. If you want to support your local restaurants, get orders to go and tip accordingly, or better yet, if they have gift cards you can buy them now to use later. I know a lot of restaurants and bars could have serious financial problems over the next few weeks (or months, gasp!) But we should not be congregating as if nothing is going on. Please do your best to keep distance and also support your local businesses. This is really an issue for the federal government which needs to step up and address this because it will become a major problem and the shops need support now more than ever. Please be mindful of all of this and try not to touch your face when you are in a public area, it is so hard not to touch your face! 

With that said, back to the White Bean and Bacon Soup. I’ve made this a few times now over the past couple months or so. It is super easy to put together, quick too, and uses mostly pantry items or things you have in the fridge already. I’ve made this with charred jalapeño chopped up and another version with Harissa, so you can swap out whatever spice you like. If you have neither of those on hand you can use a bit of paprika and/or chili powder, or, if you don’t want it spicy you can just forget about any of that and it will be just as delicious, because the bacon gives it such a wonderful rich smokey flavor. 

I will most likely be cooking with pantry items in the coming weeks and will share the recipes that work best for when you’re working with what you’ve got.

Here are a couple of links that might be helpful about the Coronavirus, what is going on in your area and why this is happening.

Stay safe friends, and most of all this is tragically more fatal to older people and people with a compromised immune systems, even if you are young it is possible to spread the virus unknowingly to others. 

white_bean_bacon_soup-2.jpg
white_bean_bacon_soup-3.jpg
white_bean_bacon_soup-4.jpg
white_bean_bacon_soup-5.jpg

White Bean and Bacon Soup

  • 4 slices thick cut bacon

  • 3 cans white beans, drained and rinsed

  • 1 carrot, diced

  • 2 celery stalks, diced

  • 1 small onion, chopped

  • 1 garlic clove, minced

  • 1 tablespoon tomato paste

  • 1 can diced tomatoes

  • 1 (heaping) tablespoon Harissa  

  • 6 cups chicken stock

  • 1 teaspoon fresh thyme (or dried thyme)

  • 1 bay leaf

  • Salt and pepper to taste

In a large dutch oven cook the bacon strips until crisp. Remove and place on paper-towel-lined plate. When cool cut bacon into half-inch pieces.

Remove some of the bacon fat from the pot, leaving 2-3 tablespoons remaining. Over medium heat add the onion, garlic, carrots and celery to the pot, cook for 10-15 minutes. Stir in the tomato paste and cook for about a minute. Add the diced tomatoes, chicken stock, harissa, thyme and bay leaf, bring to a simmer and then add the beans. Allow to simmer for about 15-20 minutes, then add the bacon and simmer for an additional 10 minutes. Add salt and pepper to taste.

Raspberry Pistachio Oat Scones

raspberry_pistacio_oat_scones-1.jpg

I haven’t made scones in a long long time. There are a couple recipes here in the archives but I haven’t made them like this before. Last week I saw Teresa posted this recipe on Instagram and it sounded really good. Plus I still have raspberries in the freezer from last summer’s harvest! I had to rinse and defrost them so they basically mushed into the batter, but not a big deal as they really tasted great. Two things I like about this recipe. 1. there is no added sugar other than maple syrup, and 2. I really like the texture of the oats in the scones. This recipe was also different in that you have sort of a shaggy loose dough, so you form it in a circle on your baking sheet, then pre-cut the slices (but not separating them), bake, then slice them apart afterward. The recipe was super easy and like I said I think it tastes great, these are not the dried out scones of yesteryear. You know what I mean? Like the ones Larry David prefers? Have you been watching the most recent Curb Your Enthusiasm? I’m trying to find a link to the scone scene, but all I can find is this part where he wants to open a spite store next door to Mocha Joe’s after being banned from there, and he thinks he knows what is the BEST scone to serve at his new spite cafe. Anyway it’s pretty funny because his scones are dry as the Sahara and nobody likes them. I promise these are not dry scones. Also, there’s an optional glaze I’ve included below in the recipe, I didn’t use it and kinda like this barely-sweet scone. However if you’re wanting something sweeter be sure to top them with the glaze. Enjoy!

raspberry_pistacio_oat_scones-3.jpg
raspberry_pistacio_oat_scones-2.jpg
raspberry_pistacio_oat_scones-4.jpg

Raspberry Pistachio Oat Scones

  • 1 cup all-purpose flour

  • 1 cup oats

  • 1 tablespoon baking powder

  • 1/2 teaspoon salt

  • 4 tablespoons butter, softened almost melted

  • 1/4 cup pure maple syrup

  • 1 tablespoon vanilla extract

  • 1 large egg

  • 1/4 cup whole milk greek yogurt

  • 1 cup raspberries

  • 1/2 cup chopped pistachios

Preheat oven to 400°F. Line a baking sheet with parchment paper and set aside. 

In a large bowl whisk together flour, oats, baking powder and salt in a bowl. Set aside.

In a separate bowl whisk together the butter, maple syrup, vanilla extract, egg, and whole milk yogurt.

Add the wet ingredients to dry ingredients and stir to combine with a wooden spoon. Gently fold in raspberries and pistachios. They will get a bit smushed. (mine did a lot!)

Place batter on top and round it into a disk shape. Batter will be sticky. Cut into 6-8 pieces (depending on the size of scone you want, I did 6) so when they come out of the oven you can run the knife through again to fully separate. 

Bake for 20-25 minutes, rotating the sheet half-way through to ensure even cooking. When done, they should be slightly firm. Finish cutting and enjoy! (They can keep on the counter, covered, for one day, but I recommend refrigerating any more than that because of the fresh fruit)

Glaze (optional)

  • 1 cup powdered sugar

  • 4-5 tablespoons milk

  • 1/2 teaspoon vanilla extract

Whisk together all the ingredients until smooth and drizzle over cooled scones.

Adapted from @aloveafare

Pork Fried Rice with Bok Choy

pork_fried_rice_bok_choy-1.jpg

This Pork Fried Rice is so good! I think it’s better than take-out to be honest. Last month I purchased Chinese barbecued pork at Costco, I wasn’t sure what I was going to do with it, maybe a stir fry or soup, but I’ve made fried rice with bacon before and it came out so good that I had no choice but to make this. The Costco pork contains two pieces at about a pound each, so the amount works great for the recipe below and you can freeze the other pound of pork. 

The original recipe had half the sauce that I have below, that’s how I made it the first time and it really needed more sauce for all that rice, so I doubled the sauce measurements and I think it came out perfect. 

Another change from the original recipe, I didn’t use solid vegetable oil, I don’t have any and I don’t want any, lol. So I used olive oil instead, you might want to try avocado oil or a peanut oil which is more suitable for high heat, I didn’t want this to be too greasy and it wasn’t! I prefer this much more than take-out fried rice that can be way too greasy. If you can’t get your hands on Chinese barbecued pork you could make this with bacon, or leftover chicken, if you’re vegetarian you can add tofu or maybe eggplant.

I included a recipe for the Bok Choy, although mine came out really chewy and was hard to eat. Depending on the type of Bok Choy you have you might want to chop it up rather than quartering it. I’ve learned that Shanghai Bok Choy is more tender, it’s greener all the way through. And the larger the Bok Choy the more fibrous and chewy it will be, so I would recommend chopping it in small pieces.  

So make some rice! Pop it in the fridge and make this the next day, you’ll love it!

pork_fried_rice_bok_choy_2-1.jpg
pork_fried_rice_bok_choy-3.jpg

Pork Fried Rice with Bok Choy

  • 6 tablespoons soy sauce 

  • 10 teaspoons rice vinegar 

  • 2 tablespoon Asian sesame oil 

  • 1/2 teaspoon sugar

  • 1/4 cup peanut oil (you can start out with less and then add as needed)

  • 3/4-1 lb Chinese barbecued Pork, cut into roughly 1/2-inch pieces

  • 1 onion, diced

  • 2 carrots, diced

  • 1 red bell pepper, diced

  • Crimini or white mushrooms, diced

  • 1 cup frozen peas, defrosted

  • 2 scallions sliced thin

  • 2 cups dry rice cooked in advance (equals about 6 cups cooked rice)

  • 4 eggs lightly beaten

In a small bowl mix together the soy sauce, rice vinegar, sesame oil and sugar, set aside.

In a large skillet or wok, heat the oil, add the diced pork and cook over high heat for a minute or so. Add the onion, carrot, bell pepper, and mushroom, cook stirring frequently until just tender. Add the eggs and scramble until just set. 

Stir in the cooked rice, peas and scallion, add the soy sauce mixture and cook until everything is hot, stirring frequently. Serve in bowls with Garlicky Bok Choy.

Garlicky Bok Choy

  • 1 tablespoon vegetable oil

  • 2 garlic cloves, chopped

  • 1 shallot, chopped

  • 1 pound baby bok choy, rinsed, cut into quarters, with core intact

  • 1 tablespoon soy sauce

Heat oil in a large skillet or wok over medium-high heat. Add garlic and shallot and cook, stirring, until fragrant, about 30 seconds. Add bok choy, soy sauce, and 2 Tbsp. water and cover immediately. Cook 1 minute. Uncover and toss, then cover and cook until bok choy is tender at the core, about 3 more minutes.

Pork Fried Rice Adapted from Food and Wine

Garlicky Bok Choy Adapted from Bon Appetit

pork_fried_rice_bok_choy-4.jpg

Crispy Thin Chocolate Chip Cookies

crispy_thin_chocolate_chip_cookies-1.jpg

Crispy Thin Chocolate Chip Cookies. I’ll tell you right now, this recipe is a keeper! I’ve been eager to make these cookies ever since I saw David Lebovitz’s blog post recently. I’ve made chocolate chip cookies before, you might remember my 2-ways post back a few years ago with that giant cast-iron pan cookie! And while those are good, these are much much better. These are absolutely delicious. They’re similar to Tate’s Chocolate Chip Cookies. What makes them thinner and crisper? I compared the two recipes and while they’re quite similar in ingredients, this one here has less flour, less egg and the addition of water. Water? Maybe that’s the secret ingredient! 

In any case I made a couple changes, using dark brown sugar rather than light brown sugar, I think it works fine. And I chopped up 7 ounces of 72% Cacao dark chocolate bars rather than using chocolate chips, it’s up to you but I like the big chocolate pieces in the cookie. David has the dough balls scooped out around a 1/4 cup each, I think that might be too much, I used a heaping tablespoon of cookie dough, rounded it out into a ball and they were pretty large, you can see from my photo below that even spacing them out a lot they still ran into each other. You basically want a 1”-1 1/4” ball. I got out my big-ass baking sheet on the next round so they had plenty of room to spread. The following batches I went for more of a 1” size ball. And all of them were done more close to 15 minutes. Not only will the time depend on the size of the cookie, but if the cookie dough is left out of the fridge longer they might be done a minute or two sooner. So keep an eye on them towards the end.

It’s January which marks the 7th anniversary of this blog! I can’t believe I’m still doing this, lol. I’ve learned a lot and have become much more comfortable cooking and baking and of course photographing the whole business. Much thanks to those that stop by to see what I’m up to, I appreciate your comments and such. I know blogging is not so much a thing these days but personally appreciate everyone out there that’s sticking to it and sharing recipes, how-tos and all that. The internet has become so toxic over the years, sometimes it’s nice to just chill out and read about cookies. I have quite a few recipes I want to share with you over the next few weeks, some of my favorites that have been on repeat. I think you’ll enjoy them. Speaking of enjoy, please please make these cookies, you won’t be disappointed.  David’s recipe is adapted from Joanne Chang’s Pastry Love: A Baker’s Journal of Favorite Recipes.

crispy_thin_chocolate_chip_cookies-2.jpg
crispy_thin_chocolate_chip_cookies-3.jpg
crispy_thin_chocolate_chip_cookies-4.jpg
crispy_thin_chocolate_chip_cookies-5.jpg
crispy_thin_chocolate_chip_cookies-6.jpg
crispy_thin_chocolate_chip_cookies-7.jpg
crispy_thin_chocolate_chip_cookies-8.jpg
crispy_thin_chocolate_chip_cookies-9.jpg
crispy_thin_chocolate_chip_cookies-10.jpg

Crispy Thin Chocolate Chip Cookies

  • 8 ounces (225g) (2 sticks) unsalted butter, at room temperature

  • 1 cup (200g) superfine sugar (or put regular sugar in blender for a few seconds)

  • 1/2 cup (100g) firmly-packed dark brown sugar

  • 1 large egg, at room temperature

  • 3 tablespoons (45g) water

  • 2 teaspoons vanilla extract

  • 1 3/4 cups (245g) flour

  • 1 1/4 teaspoon flaky sea salt or kosher salt (if using Morton's kosher salt, use 3/4 teaspoon or 1 teaspoon for more profound saltiness)

  • 1 teaspoon baking soda

  • 1 1/2 cups (280g, 7-10 ounces) bittersweet or semisweet chocolate (chopped or chips)

In a stand mixer fitted with the paddle attachment beat the butter and sugars on medium speed until light and creamy, about 5 minutes. Or use a hand mixer, doing this by hand will wear you out and take much much longer.

Stop the mixer and scrape down the sides with a rubber spatula, add in the egg, water, and vanilla and mix until well combined.

In a medium bowl mix together the flour, salt, and baking soda. Add the chopped chocolate and toss in the flour mixture. With the mixer on low speed, stir in the flour and chocolate chunk mixture until thoroughly combined. Cover the bowl (or transfer to a container and cover) refrigerate the dough at least 3 to 4 hours, or overnight.

To bake the cookies, preheat the oven to 350ºF (180ºC). Line two large baking sheet with parchment paper. Arrange the dough, formed in 1-inch to 1 1/4-inch balls on the baking sheet, spaced at least 3-inches (8cm) apart. (They will spread, so expect to get 5 or 6 on a standard baking sheet.) Press the cookies down slightly with your hand and bake until the cookies have spread and just until there are no light patches across the center, rotating the baking sheet(s) midway during baking so they bake evenly. They'll take about 13-15 minutes, check the cookies a few minutes before the timer goes off and see if they need longer. The time will depend on the size of the cooker, larger will take a bit longer but only a minute or two more.

Remove the cookies from the oven and let cool for 5 minutes. Transfer the cookies to a wire rack and cool completely.

Storage: The dough can be refrigerated up to four days, or frozen for up to three months. The cookies will keep in an airtight container for up to three days but are best the day they are baked.

Adapted from David Lebovitz who adapted it from Joanne Chang

CBD Coconut Bites

CBD_coconut_haze_snack-1.jpg

CBD Coconut Bites. Depending on where you live you might be seeing more CBD food and drinks around these days, which can be very expensive! But you can make your own for a fraction of the price. I’ve been making these for a while now, I was trying to get the right amount so that you could just have one piece, but I think two is better for the calming effects. A while back I worked with a hemp farm in Southern Oregon and posted the recipe for making your own CBD coconut oil which is pretty easy. Once you have that done these come together in no time. Recently I made them using a regular size muffin pan and they came out more like a peanut butter cup size and produced six pieces. The mini muffin pan will give you a dozen. They’re delicious, and pretty healthy too, made with CBD coconut oil, honey, chocolate, oats, nuts, good stuff. I’m looking forward to more CBD recipe development in the year ahead! Recipe below, enjoy!

CBD_coconut_haze_snack-2.jpg
CBD_coconut_haze_snack-3.jpg
CBD_coconut_haze_snack-4.jpg
CBD_coconut_haze_snack-6.jpg
CBD_coconut_haze_snack-7.jpg
CBD_coconut_haze_snack-8.jpg
CBD_coconut_haze_snack-9.jpg
CBD_coconut_haze_snack-10.jpg
CBD_coconut_haze_snack-11.jpg
CBD_coconut_haze_snack-12.jpg

CBD Coconut Bites

  • 1/3 cup (1.5 oz) Dark Chocolate, chopped in small bits

  • 1/3 cup  (1.5 oz) dry roasted hazelnuts

  • 1/4 cup Cocoa powder

  • 1/8 teaspoon kosher salt

  • 1/4 cup toasted oats

  • 1/3 cup CBD coconut oil

  • 3 tablespoons honey

  • 1/4 cup toasted coconut

In a non-stick skillet toast the oats until golden and set aside, then toast coconut for a minute or two until golden brown, set aside to cool.

Line a mini muffin pan with paper liners for 12 pieces, or regular size muffin pan for 6 pieces.

In a food processor place the nuts, cocoa and salt. Pulse a few times until the nuts are roughly chopped.

Place the CBD Coconut oil and honey in a medium pot and bring to a boil. Remove from heat and stir in the chopped chocolate until mostly melted, then stir in the nut mixture and toasted oats. 

Fill each cupcake tin with the mixture and top with toasted coconut flakes. Refrigerate for at least 1 hour or place in the freezer for 30 minutes. Store in refrigerator or cool place. 

Old Fashioned Cocktail

old_fashioned_cocktail-1.jpg

Old Fashioned Cocktail. It all starts with Bourbon. Kentucky Bourbon. We went to Kentucky over the holidays to visit with Jeff’s family and friends, I wish I had more photos to share of the farms, the distilleries, the cows, but it was a more personal trip rather than an Instagram trip. And I’m glad that it was. There are moments that are better left with memories in your heart than photos splattered on Instagram. That said I did have some wonderful food and drink. I want to end this year with a cocktail, as I often do, and bring you the Old Fashioned Cocktail. 

It can be made with either Rye or Bourbon, but I think Bourbon is the best choice in this case. The original way of preparing it is by muddling a sugar cube with the bitters. I didn’t have sugar cubes so I made a simple syrup instead. I also don’t like cocktails too sweet so this made it easier to get the sugar ratio to my liking. 

As with many old old recipes, the origins are not clear. But It has its roots in Louisville, KY which claims to have first invented the drink. From there to New York City, who knows? In any case it’s a wonderful cocktail. A couple things I’ll note, the more orange tasting the better (rub the orange peel on the rim), also it’s ok to go heavier on the Angostura bitters if that’s what you like. It’s sort of like adding salt to food, everyone has their taste. 

This year (well the past few years) has had its share of ups and downs, so I’m looking forward to more ups than downs in 2020, lol. It’s been quite a decade! (egads!) I’ve lived in four different apartments and now in one house that we own, over three states and 3000 miles. I started the blog in January 2013 while I was looking for work in San Francisco, it was a fun creative project and still is. I learned a whole lot about cooking, photography and myself. So I guess I’ll always remember the “teens” as my food blog years. Where will I go from here? I’m not sure. We’re always in a place of self discovery, that will never end. But I hope to share what I’ve learned over the years in some capacity. So we’ll see. I wish you all the very best in the coming year and going forward. Cheers! Bourbon! Yeah! Happy New Year! :)

old_fashioned_cocktail-2.jpg
old_fashioned_cocktail-3.jpg
old_fashioned_cocktail-4.jpg
old_fashioned_cocktail-5.jpg
old_fashioned_cocktail-6.jpg
old_fashioned_cocktail-7.jpg
old_fashioned_cocktail-8.jpg
old_fashioned_cocktail-9.jpg

Old Fashioned Cocktail

Mix the simple syrup and bitters in a chilled rocks glass. Add Bourbon and stir. Add one large ice cube, or a few small cubes, stir until chilled and properly diluted, at least 30 seconds. Garnish with orange twist on the side of the cube and Cherry.

Simple Syrup

  • 1 cup sugar

  • 1 cup water

In small pot place sugar and water over medium heat, bring to a simmer and remove from heat. Allow to cool. Transfer to jar and refrigerate. 

Homemade Eggnog

homemade_eggnog-1.jpg

Homemade Eggnog! I partnered with Pete and Gerry’s Organic Eggs for a holiday recipe and knew I wanted to make eggnog. I’ve been meaning to make it for some time now, I usually buy it in the store this time of year, and honestly it’s been so long since I’ve had homemade I wasn’t sure what to expect but I can tell you right now it is so much better!

When I shop for eggs there’s such a vast range in price, even on the organic end, so I generally buy somewhere in the middle, thinking what could be so different? Well, there really are differences. These eggs are definitely high-quality. They have a nice hard shell that doesn’t crush in your hand when you break it - no bits of shell falling into the bowl or pan, and the yolks are vibrant in color with excellent flavor. They are good to their free-roaming chickens and they are good to the earth too. Pete and Gerry’s Organic Eggs are free from pesticides, added hormones, antibiotics, and GMOs, and they come from small family farms that are dedicated to humane animal treatment, safety, and environmental sustainability. Most of their farms are on the east coast but their eggs are available here in the Pacific Northwest as well.

As I mentioned before the Eggnog tastes incredible, it’s much lighter and creamier than store-bought. The recipe below is a cooked version which is very similar to making a custard, lots of whisking involved but it comes together very quick. After I added the brandy and bourbon I took a whiff and thought maybe it was too boozy! But it’s fine, after it chills the flavors mellow out and I think it’s a perfect amount. Cheers!

This is a paid partnership with Pete and Gerry’s Organic Eggs, all opinions are my own.

homemade_eggnog-2.jpg
homemade_eggnog-3.jpg
homemade_eggnog-4.jpg
homemade_eggnog-5.jpg
homemade_eggnog-6.jpg
homemade_eggnog-7.jpg
homemade_eggnog-8.jpg
homemade_eggnog-9.jpg
homemade_eggnog-10.jpg
homemade_eggnog-11.jpg

Homemade Eggnog

  • 6 whole eggs

  • 1/4 cup of sugar

  • 1/4 teaspoon salt

  • 3/4 cup brandy

  • 1/4 cup bourbon

  • 1/2 teaspoon of vanilla extract

  • 1/4 teaspoon of fresh ground nutmeg

  • 1 cup heavy whipping cream

  • 2 cups whole milk

  • Cinnamon Sticks to garnish

Whisk the eggs and sugar together in a medium bowl until light and creamy.

In a saucepan whisk the cream, milk, nutmeg and salt, cook over medium-high heat, whisking often until mixture just starts to simmer. Then whisk the milk mixture into the egg mixture a little bit at a time using a ladle or measuring cup, whisk vigorously to temper the eggs, (you don’t want scrambled eggs!) once you’ve incorporated about a half of the milk mixture pour all of it back into your saucepan and return to stove. Over a medium heat whisk the mixture until slightly thickened and it reaches 160°F (about 2-4 minutes). Remove from stove and stir in the vanilla, brandy and bourbon. Pour into pitcher or jar and refrigerate for at least 3 hours (or longer) until well chilled. Serve with some freshly grated nutmeg on top and cinnamon stick. The eggnog will stay fresh refrigerated for one week.

homemade_eggnog-12.jpg

Turkey Roulade with Dried Cherries and Sausage Stuffing

turkey_roulade-1.jpg

I’m so happy to finally be getting this Turkey Roulade with Dried Cherries and Sausage Stuffing up on the blog! I’ve been making it a few years now for Thanksgiving but you know how crazy it can get and I never have time for photos. Well here is a next day photo. I was lucky enough to find a turkey breast that was nearly four-pounds, the last couple years all I could get was a two or two and half pound breast, but with the larger size there was enough left over for a decent photograph. This is a great alternative to roasting a whole turkey if you have a small gathering or are a couple like Jeff and myself. If you end up with the smaller turkey breast whether by choice or availability, you can either buy two smaller ones or halve the stuffing recipe accordingly because it makes quite a bit, even with this larger breast I had some leftover. And if you have leftover stuffing that you decide to keep in the oven, don’t forget about it! Heartbreakingly we had turned off the oven, forgot about it and then discovered it the next day, so I had to toss it. Which is really a shame because it tastes so incredibly good not to mention all the work in preparing it. Anyways, I’m glad to be sharing the recipe with you, this could work for any holiday or celebration really. 

The recipe says to roast the roulade 15 minutes to the pound, and this is true, for me the two-pound breast was done in 30 minutes, and the four-pound in one hour. Really the most prep time is making the stuffing, then trying to roll it up in twine which is much easier with the larger breast. The only thing I’m adding to the recipe would be to brine the turkey the night before, I added lots of salt, peppercorns and some fresh herbs to it. I remember one year it came out too dry so I definitely recommend the brine. Oh and one more thing, don’t worry about butterflying and deboning the turkey breast yourself, any butcher in any grocery store or meat market anywhere in the world can do this for you, leave it to the professionals. I used to be shy about asking for such things but it is 100% acceptable to ask. If you want to do it yourself: how to butterfly a turkey breast. Thanks for stopping by. Enjoy!

One more thing, the original recipe said to use the pan drippings from the roasted roulade for the gravy, and to make the gravy while it’s still in the oven, which is impossible! (I edited the recipe so it makes sense). So if you want you can make the gravy while the Turkey Roulade is resting and use those additional pan drippings from the oven pan, but I didn’t and made the gravy in the pan that the Roulade was seared in. Hope that’s not confusing, but it all works out wonderfully in the end. :)

turkey_roulade-2.jpg
turkey_roulade-3.jpg

Turkey Roulade with Dried Cherries and Sausage Stuffing (+ Gravy!)

  • 3 1/2-4 pound boneless turkey breast, skin on and butterflied (I recommend an overnight brine)

  • 1/4 cup butter

  • 3/4 cup finely chopped onions (about 1 small onion)

  • 1/2 cup finely chopped celery (about 2 ribs)

  • 1/2 cup finely chopped fennel (about 1 small fennel bulb)

  • 1/2 cup finely chopped leeks (about 1 leek)

  • 1 clove garlic, minced

  • Salt and pepper, to taste

  • 1/4 cup dried cherries, roughly chopped

  • 1/2 cup cognac (or any kind of brandy)

  • 4 tablespoons extra-virgin olive oil, divided

  • 8 ounces mushrooms, such as chanterelle, cremeni or shitake, roughly chopped

  • 1/2 pound sweet Italian sausage, crumbled

  • 2 tablespoons chopped fresh parsley

  • 1 tablespoon chopped fresh rosemary

  • 1 tablespoon chopped fresh sage

  • 2 teaspoons chopped fresh thyme

  • 3 tablespoons pine nuts, toasted

In a large skillet over medium heat, melt the butter until foamy. Add the onions, celery, fennel, leeks and garlic. Season with salt and pepper and sauté, stirring occasionally, until the vegetables are very soft, about 10 to 12 minutes. Add the dried cherries and cook until the cherries are plump, about 3 minutes. Add the cognac and reduce until almost evaporated, about 5 minutes. Remove from the heat and transfer the mixture to a large bowl.

Wipe out skillet and heat 2 tablespoons of the olive oil over medium-high heat. Add the mushrooms. Season with salt and cook, stirring often, until any water they have released has evaporated, about 6 to 8 minutes. Add the sausage and cook until the sausage has browned but is still slightly raw in the center, about 5 minutes. Remove from the heat and add the mushroom-sausage mixture to the cooked vegetables. Mix in the herbs and pine nuts until thoroughly combined. Season with salt and pepper.

Preheat the oven to 425°.

Remove the turkey from the refrigerator and place on a clean work surface, skin-side down. Pat the turkey dry on both sides using paper towels. If the turkey breast looks too uneven in thickness, use a meat pounder to flatten the thicker portion. Season both sides liberally with salt and pepper. Place the filling mixture in the center and evenly spread over the surface, leaving a 1-inch border at the edges. Beginning at the shortest end, carefully roll the breast up, enclosing the stuffing. Using kitchen twine, tie the roulade at 1-inch intervals. Season the outside liberally with salt and pepper.

Wipe out the skillet and heat the remaining 2 tablespoons of olive oil over medium-high heat. Add the turkey roulade and brown on all sides, about 12 to 14 minutes. Transfer the turkey to an parchment-lined baking sheet and roast until an instant-read thermometer inserted in the thickest part of the meat reads 150°, about 12 to 15 minutes per pound. Reserve the pan for gravy. Remove the roulade from the oven and form a loose tent using foil and allow to rest on a clean work surface. 

Gravy

  • 3 sprigs fresh flat-leaf parsley

  • 2 sprigs fresh thyme

  • 2 sprigs fresh sage

  • 1 fresh bay leaf

  • 1 large shallot, finely diced

  • 1 garlic clove, smashed

  • 1/4 cup white wine

  • 2 1/2 tablespoons all-purpose flour

  • 4 cups chicken stock, preferably homemade

  • Salt and freshly ground pepper, to taste

  • 2 tablespoons unsalted butter

While the turkey is roasting, make the gravy: Tie the parsley, thyme, sage and bay leaf together using kitchen twine to form a bouquet garni, (you can place all the herbs in cheesecloth and tie it up if it’s easier). Place the reserved pan over medium heat. Add the shallot and garlic and cook, stirring often, until softened, about 6 to 8 minutes. Add the wine, scraping any brown bits on the bottom and reduce by half. Adjust the heat to low. Add the flour and stir until the roux has become golden brown, about 4 to 5 minutes. Add the bouquet garni and cook for 1 minute. Add the chicken stock to the saucepan and bring to a simmer, stirring constantly, until the gravy has reduced to 2 cups and coats the back of a wooden spoon, about 15 minutes. Remove from the heat and strain through a fine-mesh sieve. Stir in the butter and season with salt and pepper.

Adapted from Tasting Table


French Onion Soup

french_onion_soup-1.jpg

Hi folks! This is my first attempt at making French Onion Soup. There were a lot of recipes to choose from, all pretty similar, but the one I adapted here (from Food52) had a generous amount of red wine so I went with that, because red wine + beef broth = amazing flavor. But first I had to buy some individual oven-safe soup bowls. I found these at Crate and Barrel (on sale! yay!) and got the little platters to go with them. I think they’re really cute and will work great for future soup and sandwich situations. So as far as the soup goes, the biggest challenge will be cutting all those onions without burning your eyes, as I mention below in the recipe, I recommend using a food processor to slice them, be advised when you’re done and open the lid you will experience all that cut onion at once! I had to put the lid back on until I was ready to put them in the pan. Alternatively you can put the onions in the refrigerator a day in advance, or even the freezer if you don’t have that much time, this greatly reduces the burn factor. The cheese: I made the individual crocks twice, the first time I didn’t put enough soup in the bowl so I didn’t get the draped cheese effect. The second time I made it, which is what you see here, I added enough soup and really piled on the bread and cheese, but still, I only got a little drape. But seriously I can’t complain it tasted so good!

Another thing worth mentioning is that if you cook the soup and then refrigerate it overnight, it will taste even better the next day. It’s just a fact. Recipe below, enjoy!

french_onion_soup-3.jpg
french_onion_soup-2.jpg

French Onion Soup

  • 2 1/2 - 3 pounds onions

  • 3 tablespoons butter

  • 2 tablespoons olive oil

  • 3 cloves of garlic, smashed

  • 1 generous pinch of salt

  • Fresh ground black pepper, a few twists

  • 4 sprigs fresh thyme

  • 1 bay leaf

  • 6 cups beef stock

  • 2 cups red wine

  • 1 baguette or other crusty bread

  • 4-6 slices of swiss cheese, one for each serving

  • Grated gruyere cheese, a handful for each serving

Halve and slice the onions. I highly recommend a food processor to slice the onions. Slicing this many onions can be torture, if you don’t have a food processor place the onions in the refrigerator a day before and they won’t burn your eyes (as much if at all).

Melt together the butter and olive oil in a large dutch oven, add the garlic until it’s caramelized. Add the onions, season with salt and pepper, and stir around just until the onions are all coated in the olive oil/butter. Add in the fresh thyme and the bay leaf and let the onions caramelize, about 20-30 minutes. They will be golden to brown in color.

Once the onions are caramelized and have cooked down, pour in the stock and wine. Simmer uncovered for at least an hour and as much as three hours, add salt and pepper to adjust the flavors.

Meanwhile, slice the bread and toast in a 400° oven until lightly golden brown. You'll want 2 pieces of bread per person - one for the bottom of the bowl, and one for on top.

Grate your cheese. Alternatively, you can drape a deli-cut slice of cheese (swiss or gruyere) over the top of the bowls. I used both, grated cheese on the soup, then a slice of swiss over the toast slice.

Preheat your broiler. Remove the thyme sprigs and bay leaf from the soup. Arrange your oven-safe individual serving bowls on a baking sheet.

To prepare, place a toast slice in the bottom of each bowl. Ladle in the soup (close to the top of the bowl) top with some grated cheese, a slice of toast, then a slice of cheese or more grated cheese. Be generous! You want the cheese to seal in the soup and drape over the edge of the bowl. Which mine sort of did and didn’t, I swear I put so much cheese but it still melted down into the soup, so as you’re stacking your cheese and bread make sure to pile it high!

Makes about 4-6 servings.

Adapted from Food52